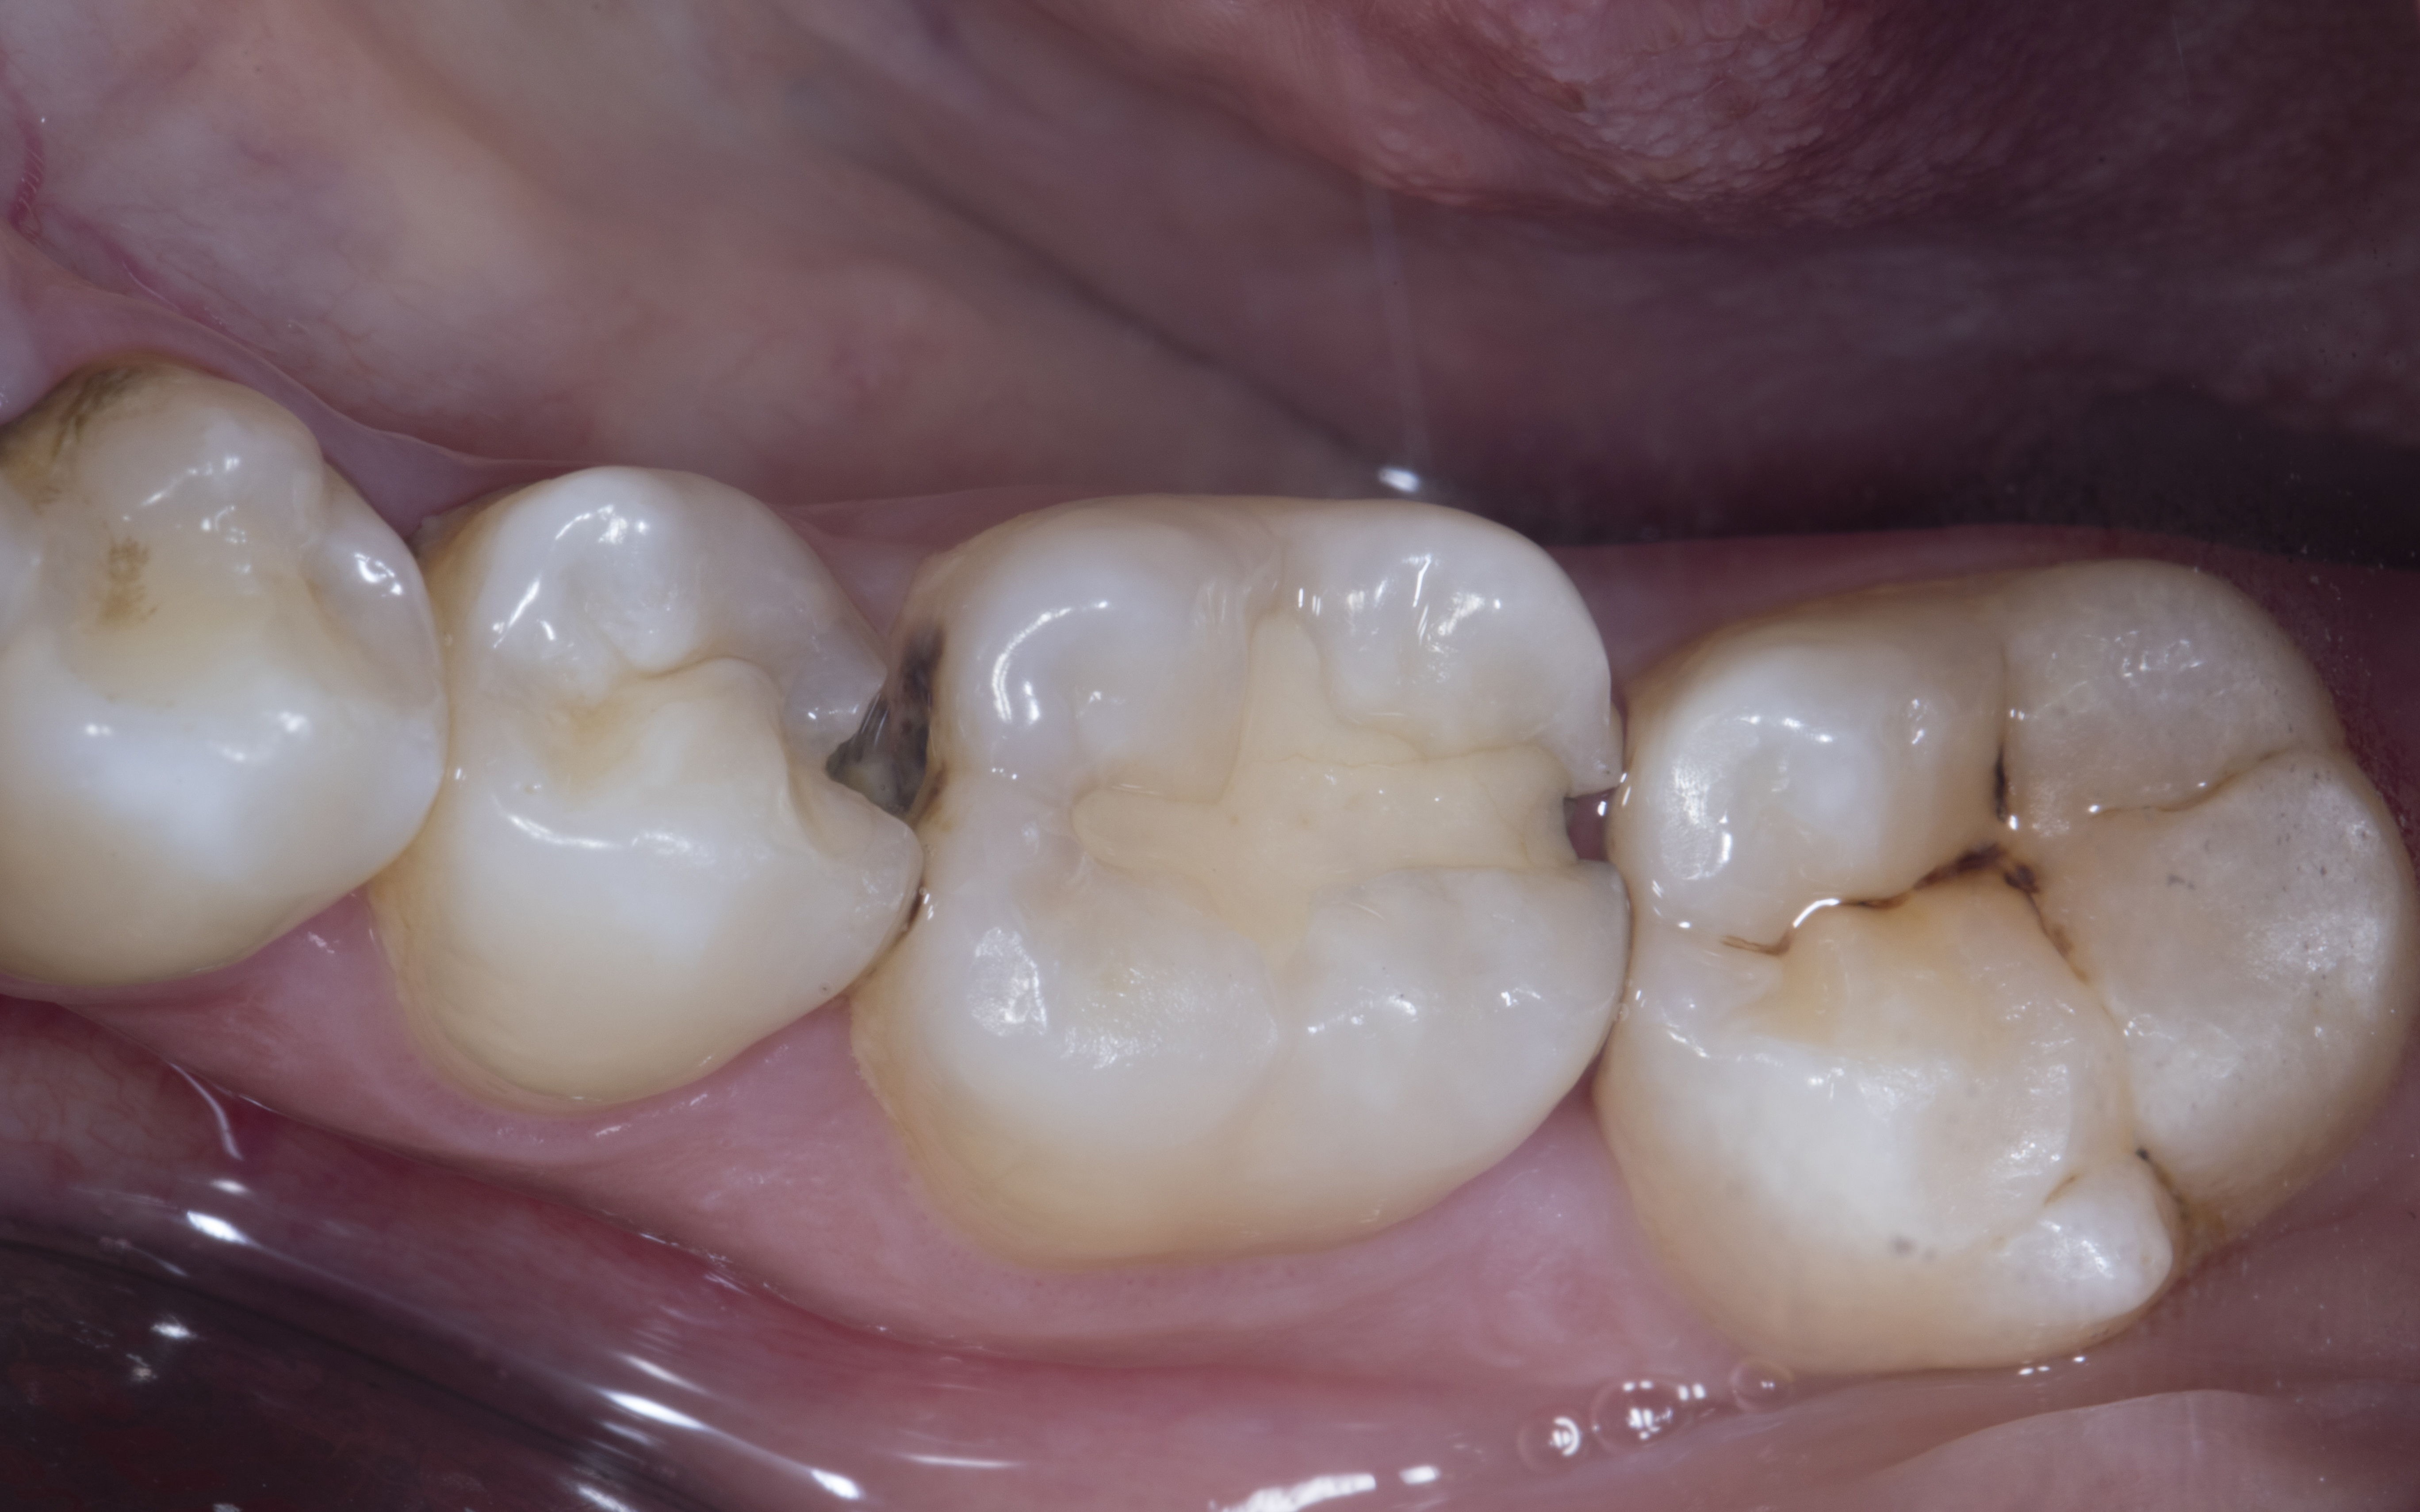
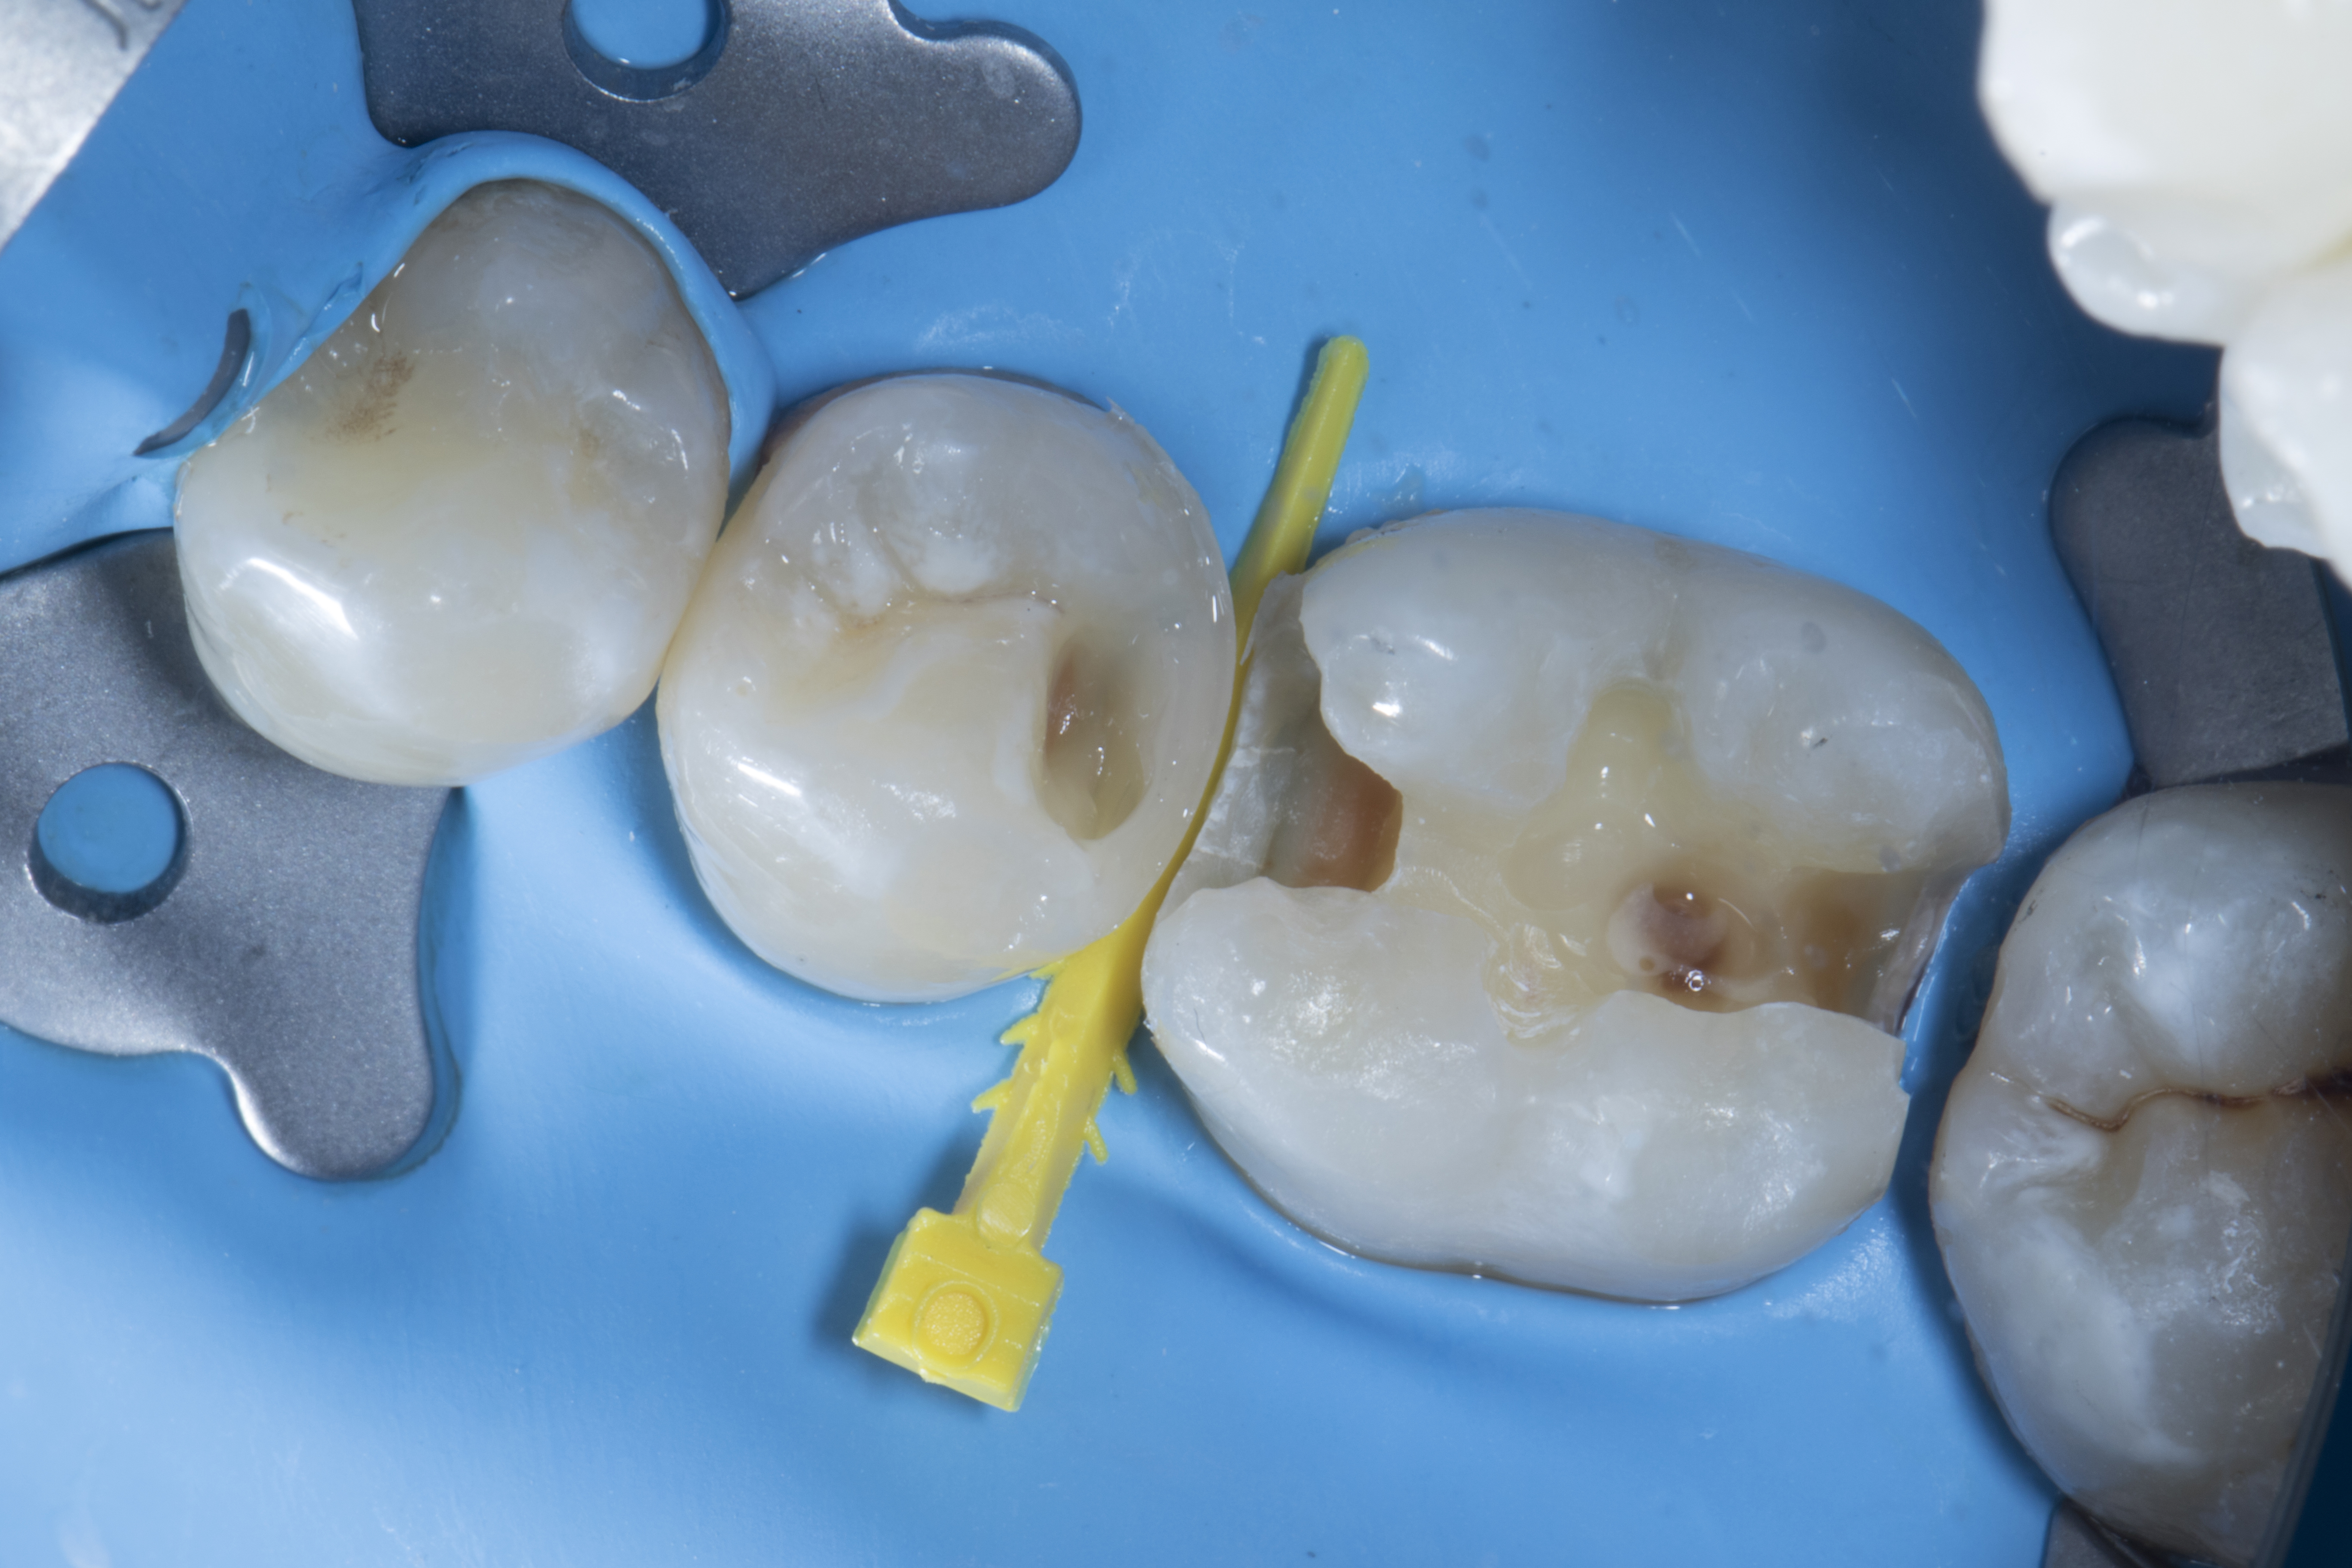
A 25 Years old male patient visited the clinic with a carious lesion on tooth #35 distally and #36 both mesially and distally. Tooth # 36 shows old composite restoration. The patient complains of sensitivity in the 35-36 region when exposed to cold or sweet.
|
|
| Figure 1. A carious lesion on tooth #35 distally and #36 both mesially and distally. Tooth #36 shows old composite restoration. |
Step 1 - Rubber dam isolation was done with a heavy dam. This is important if you want to achieve optimal bonding to increase longevity of the restoration.
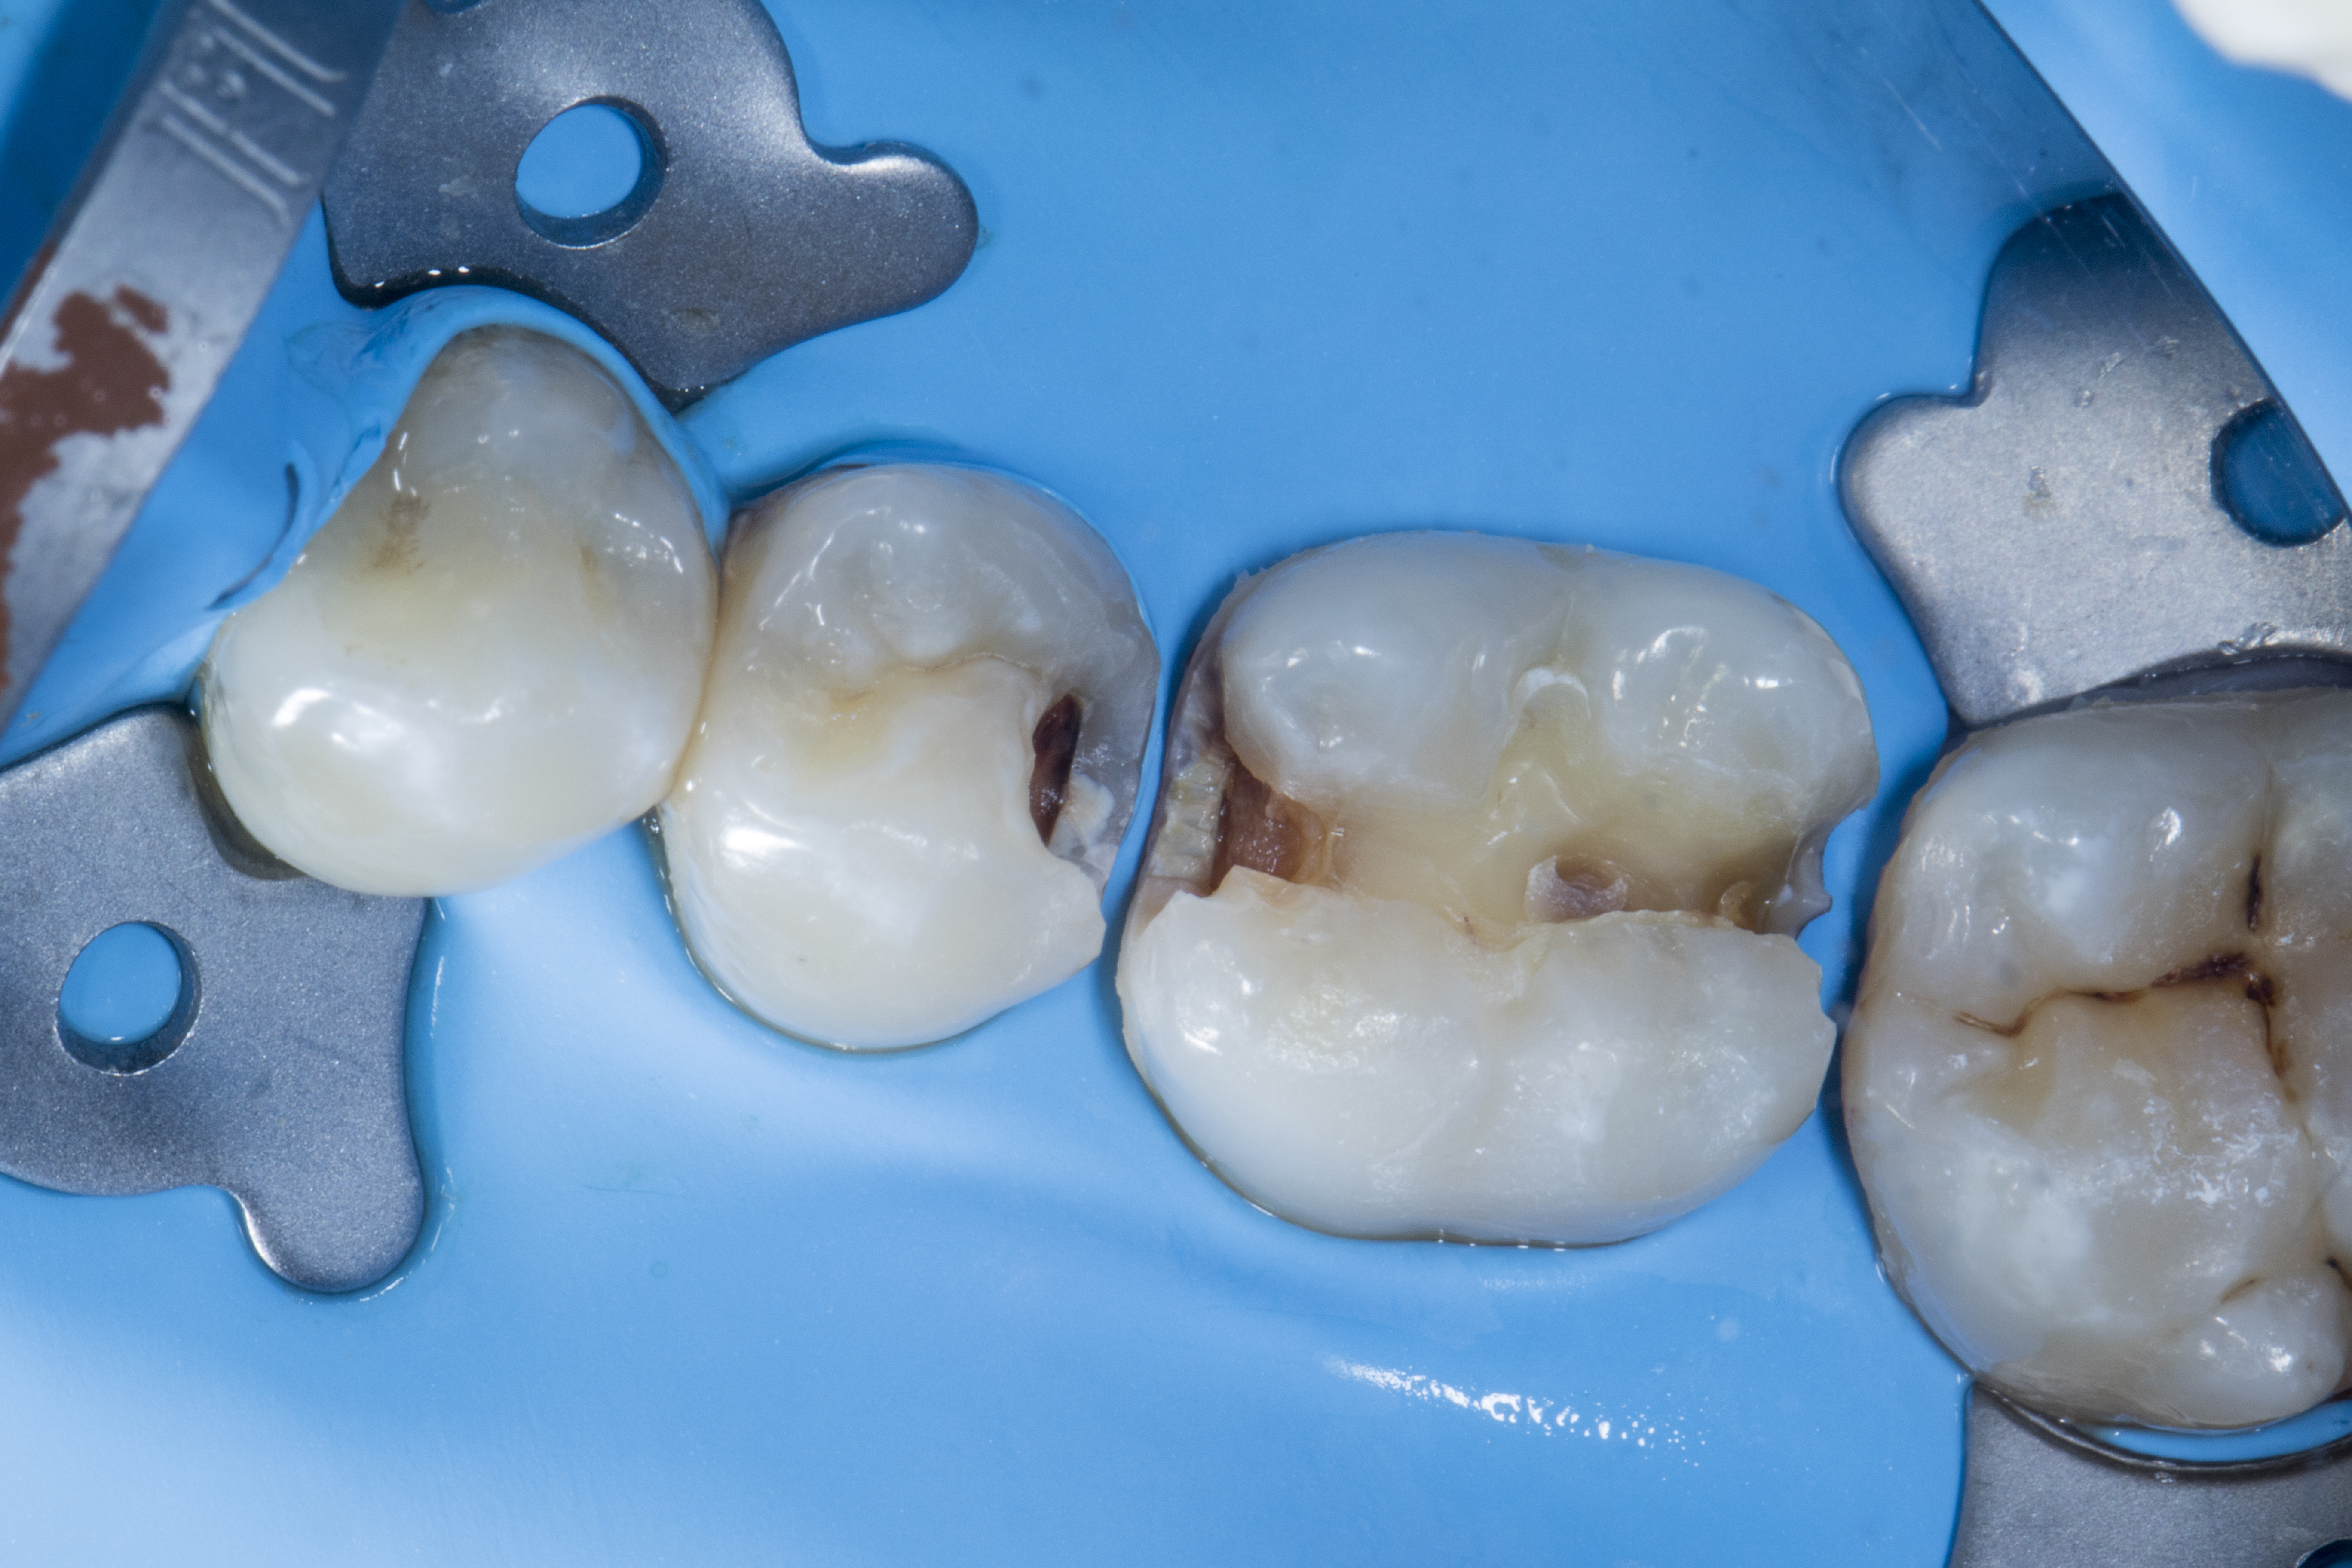
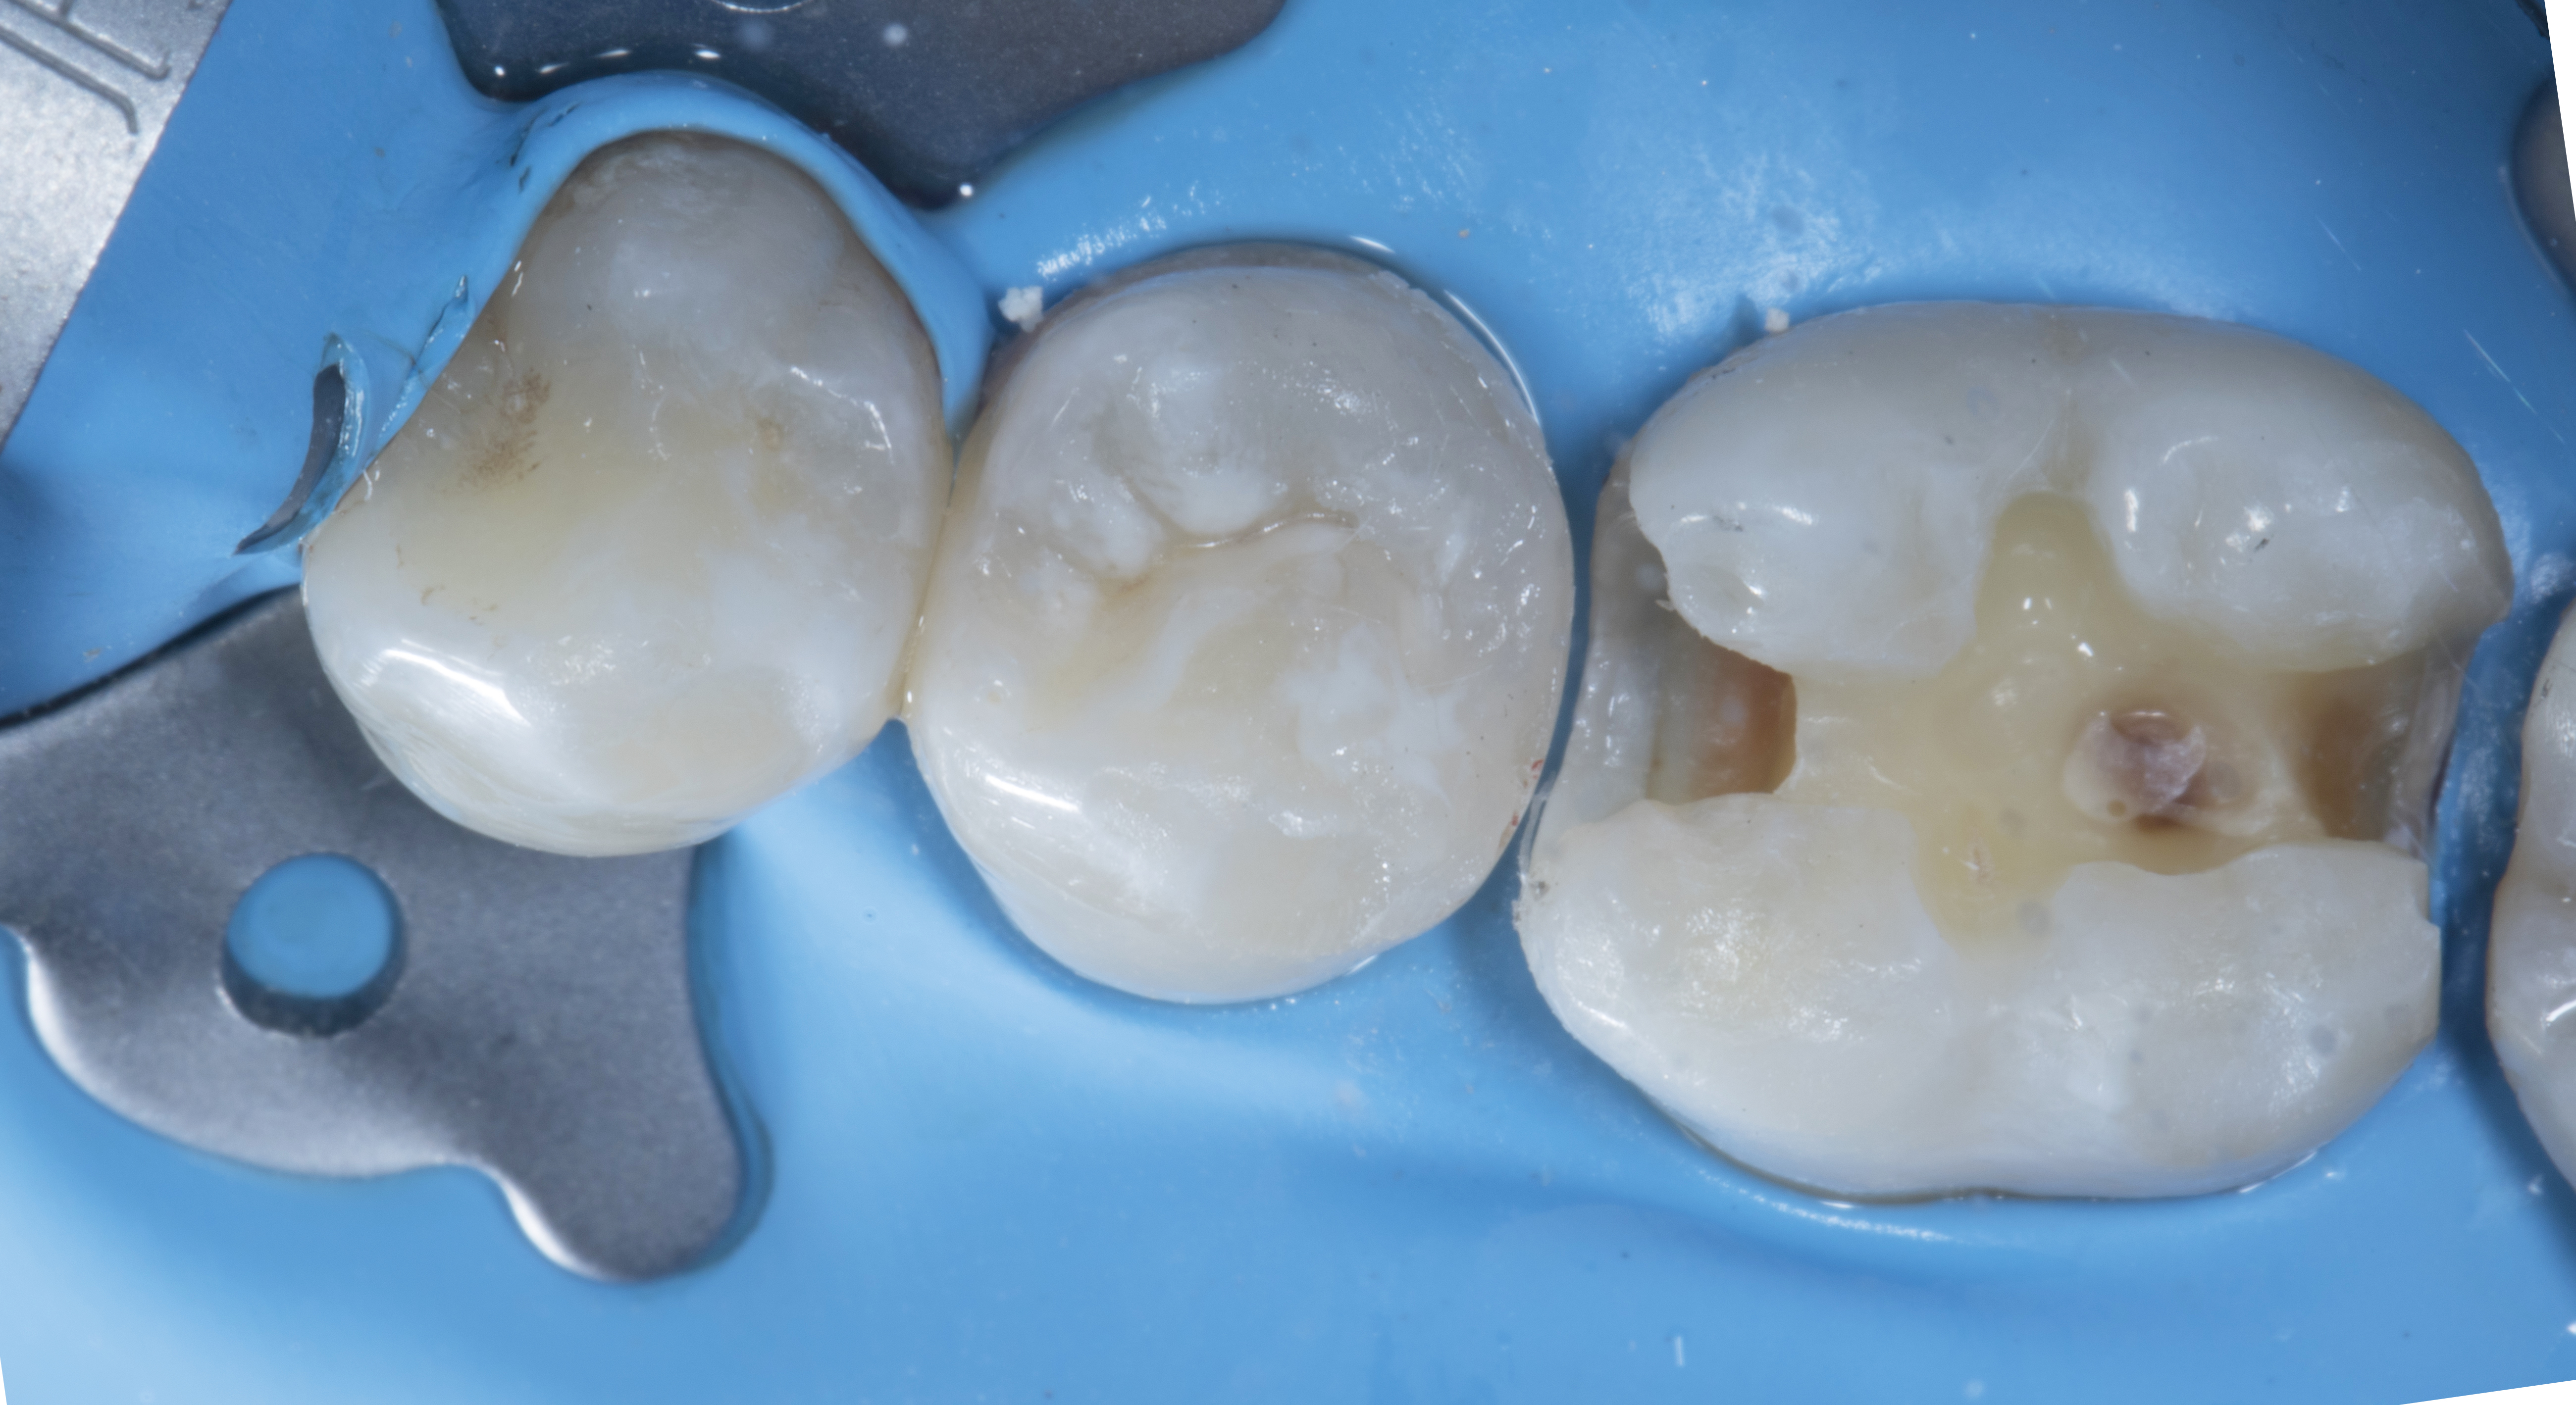
Step 2 – Restoration of tooth #35. After the initial cavity preparation, a deeper carious lesion was identified. Caries dye was applied to effectively remove caries with the help of a slow speed round carbide bur.
|
|
| Figure 2. After the initial cavity preparation a deeper carious lesion was identified. |
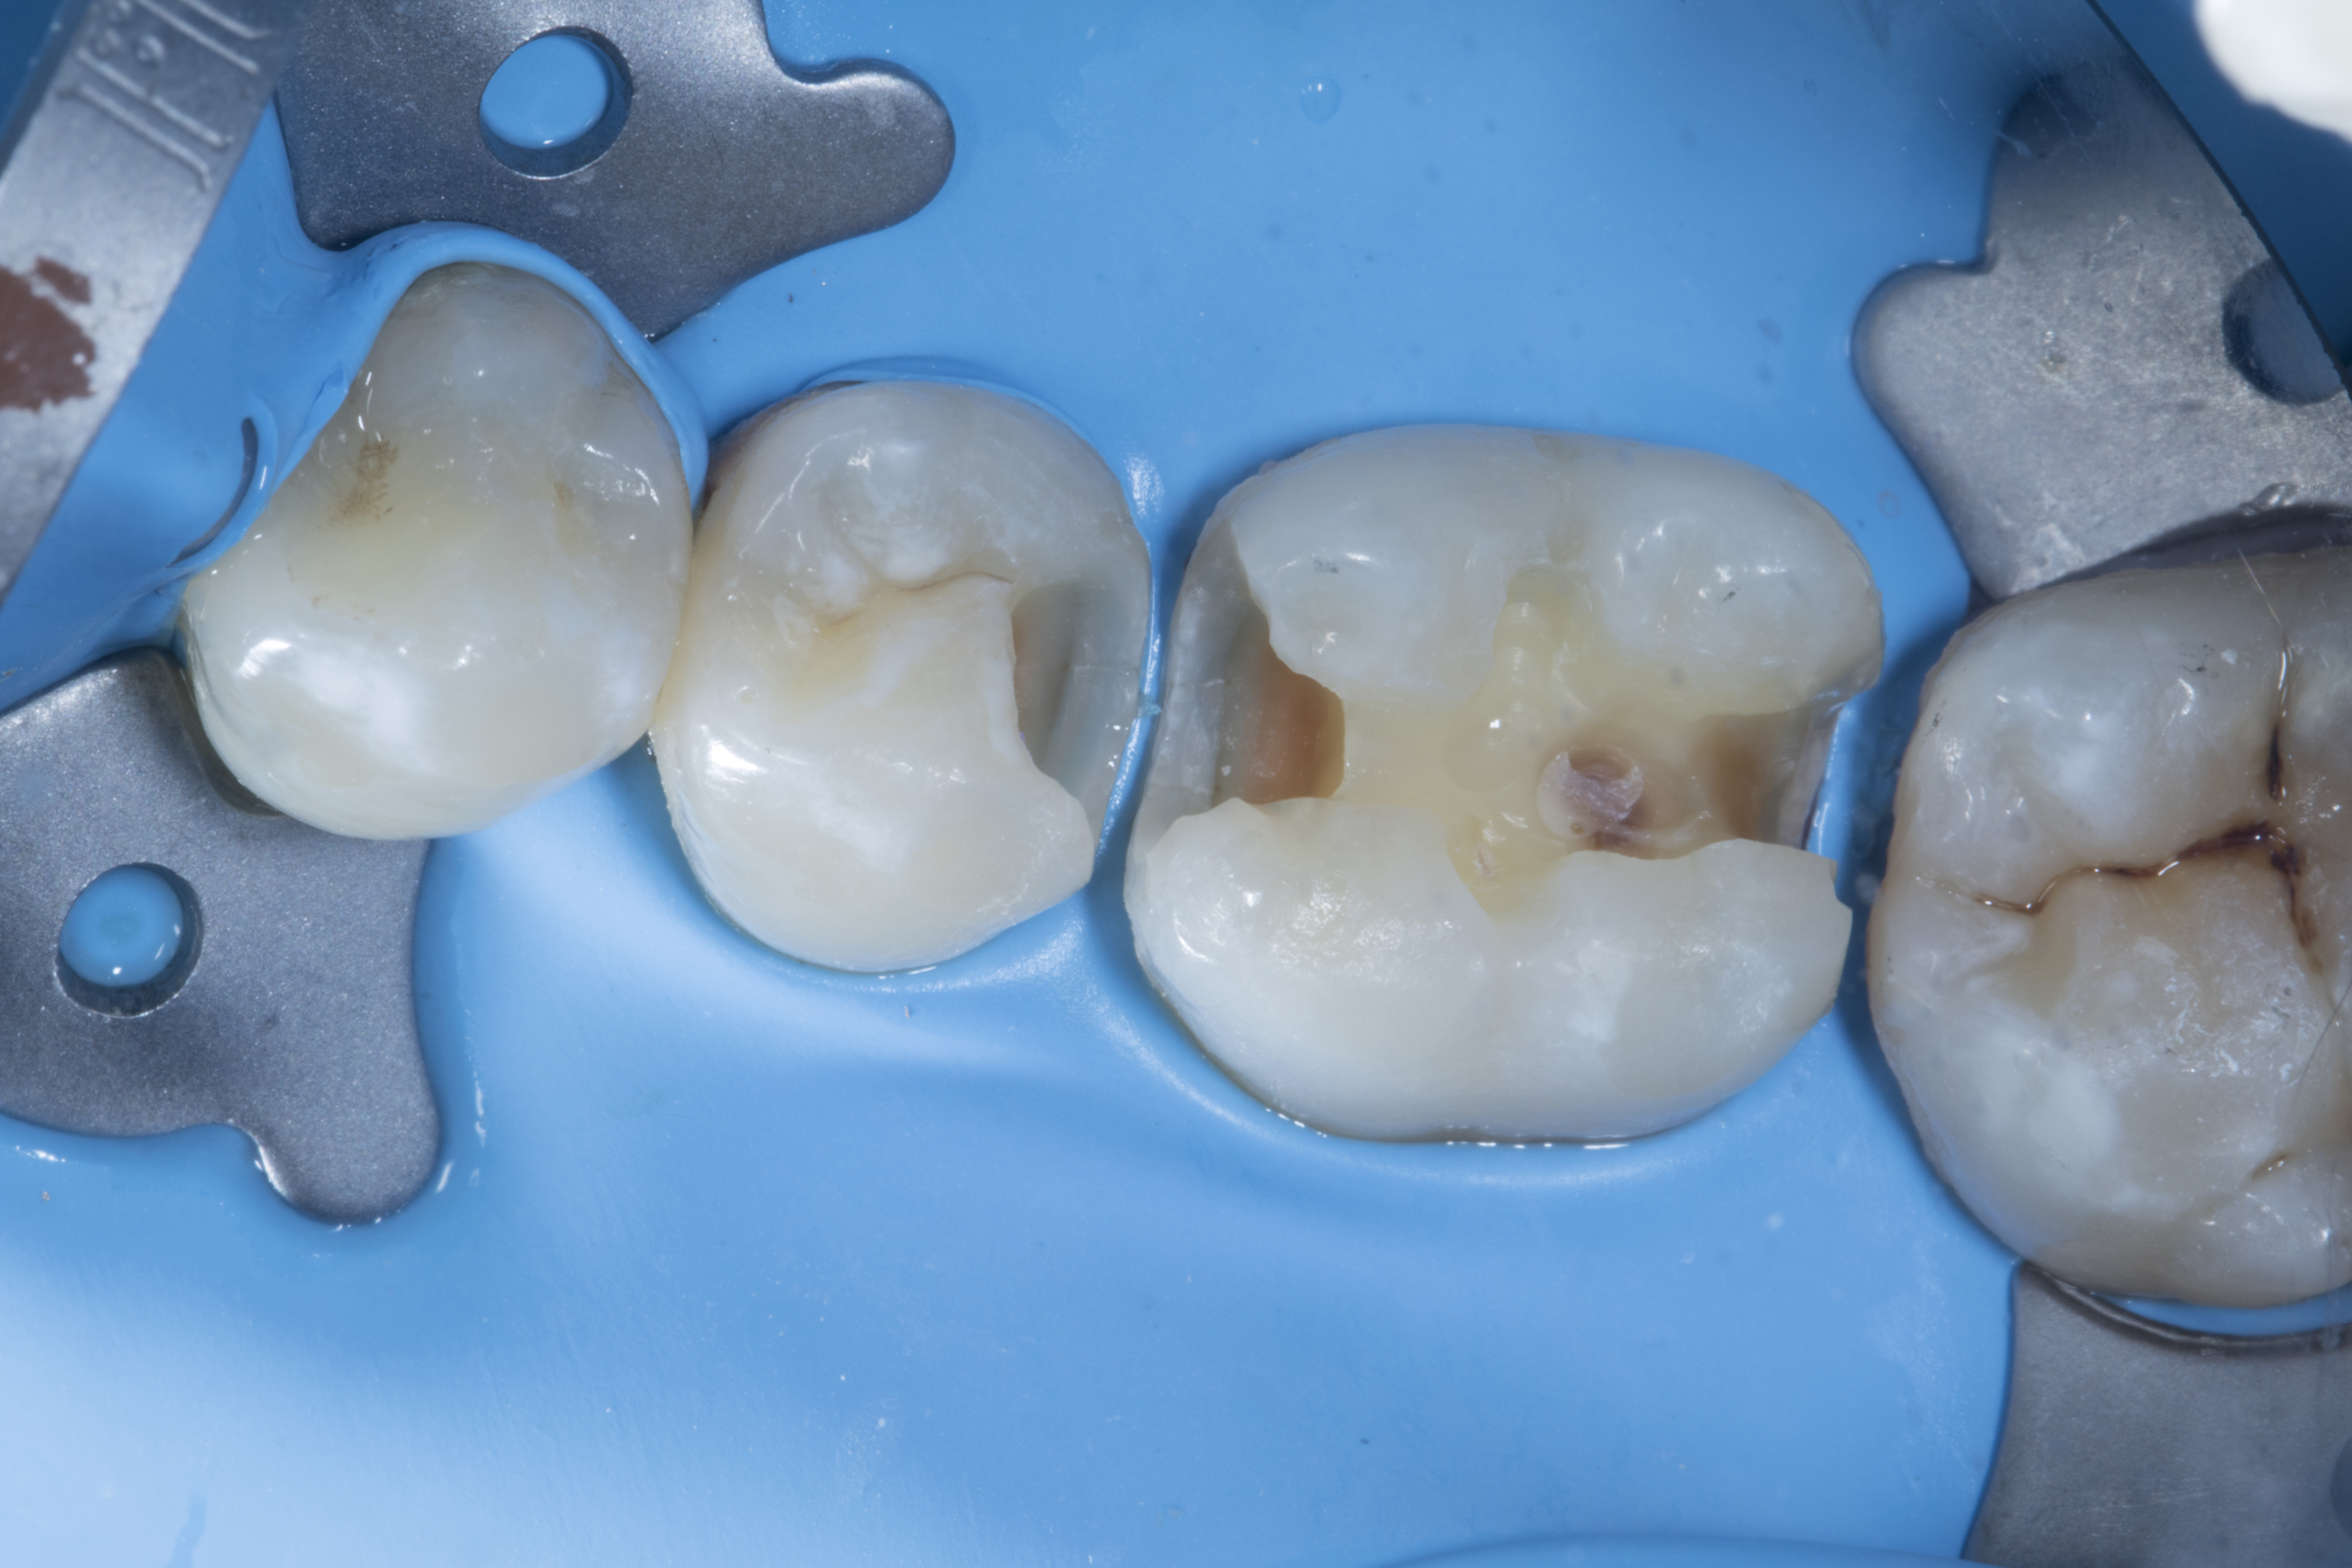
Step 3 – After removal of decay, the tooth was prepared using a small double-sided Super-Snap Purple disk to bevel the proximal box, remove sharp edges and unsupported enamel.
Clincial tip: This is the most important step if you want to achieve great margin seal and avoid microleakage.
|
|
| Figure 3. After removal of decay, sharp edges and unsupported enamel and beveling of proximal box with the help of Super Snap (Shofu) double sided purple disk. |
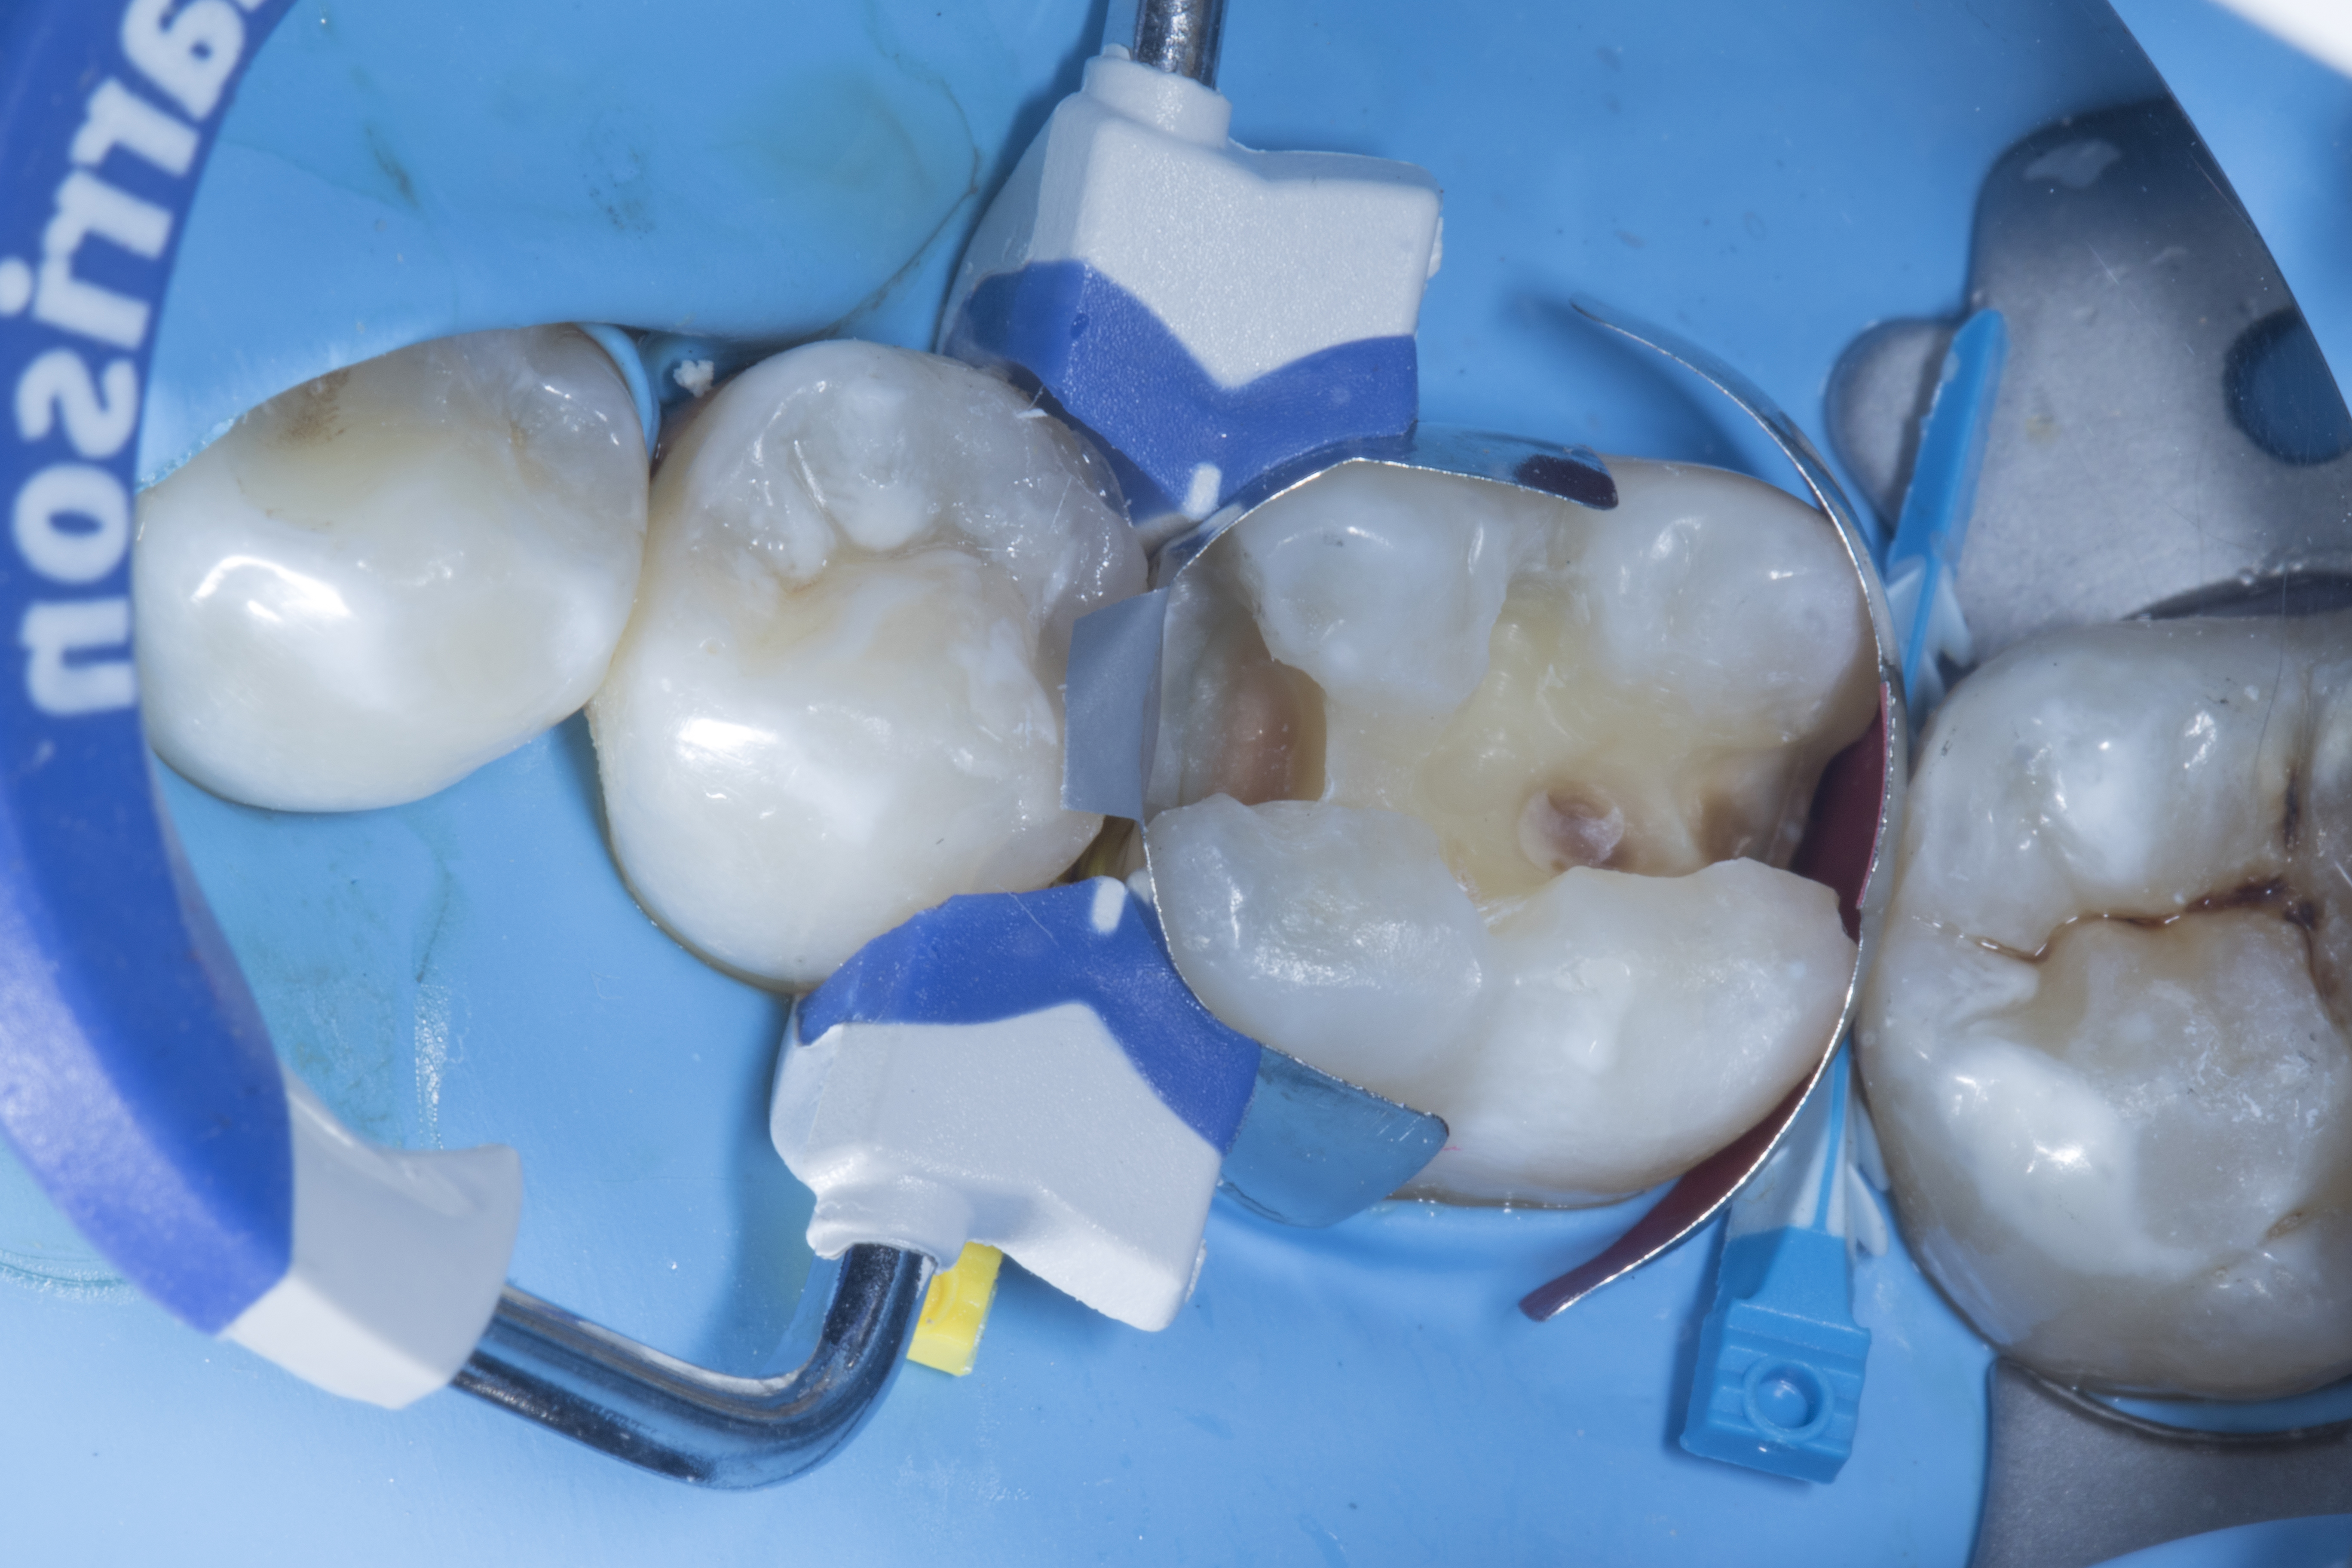
Step 4 – In order to achieve a natural contact, tooth #35 was restored first followed by tooth #36.
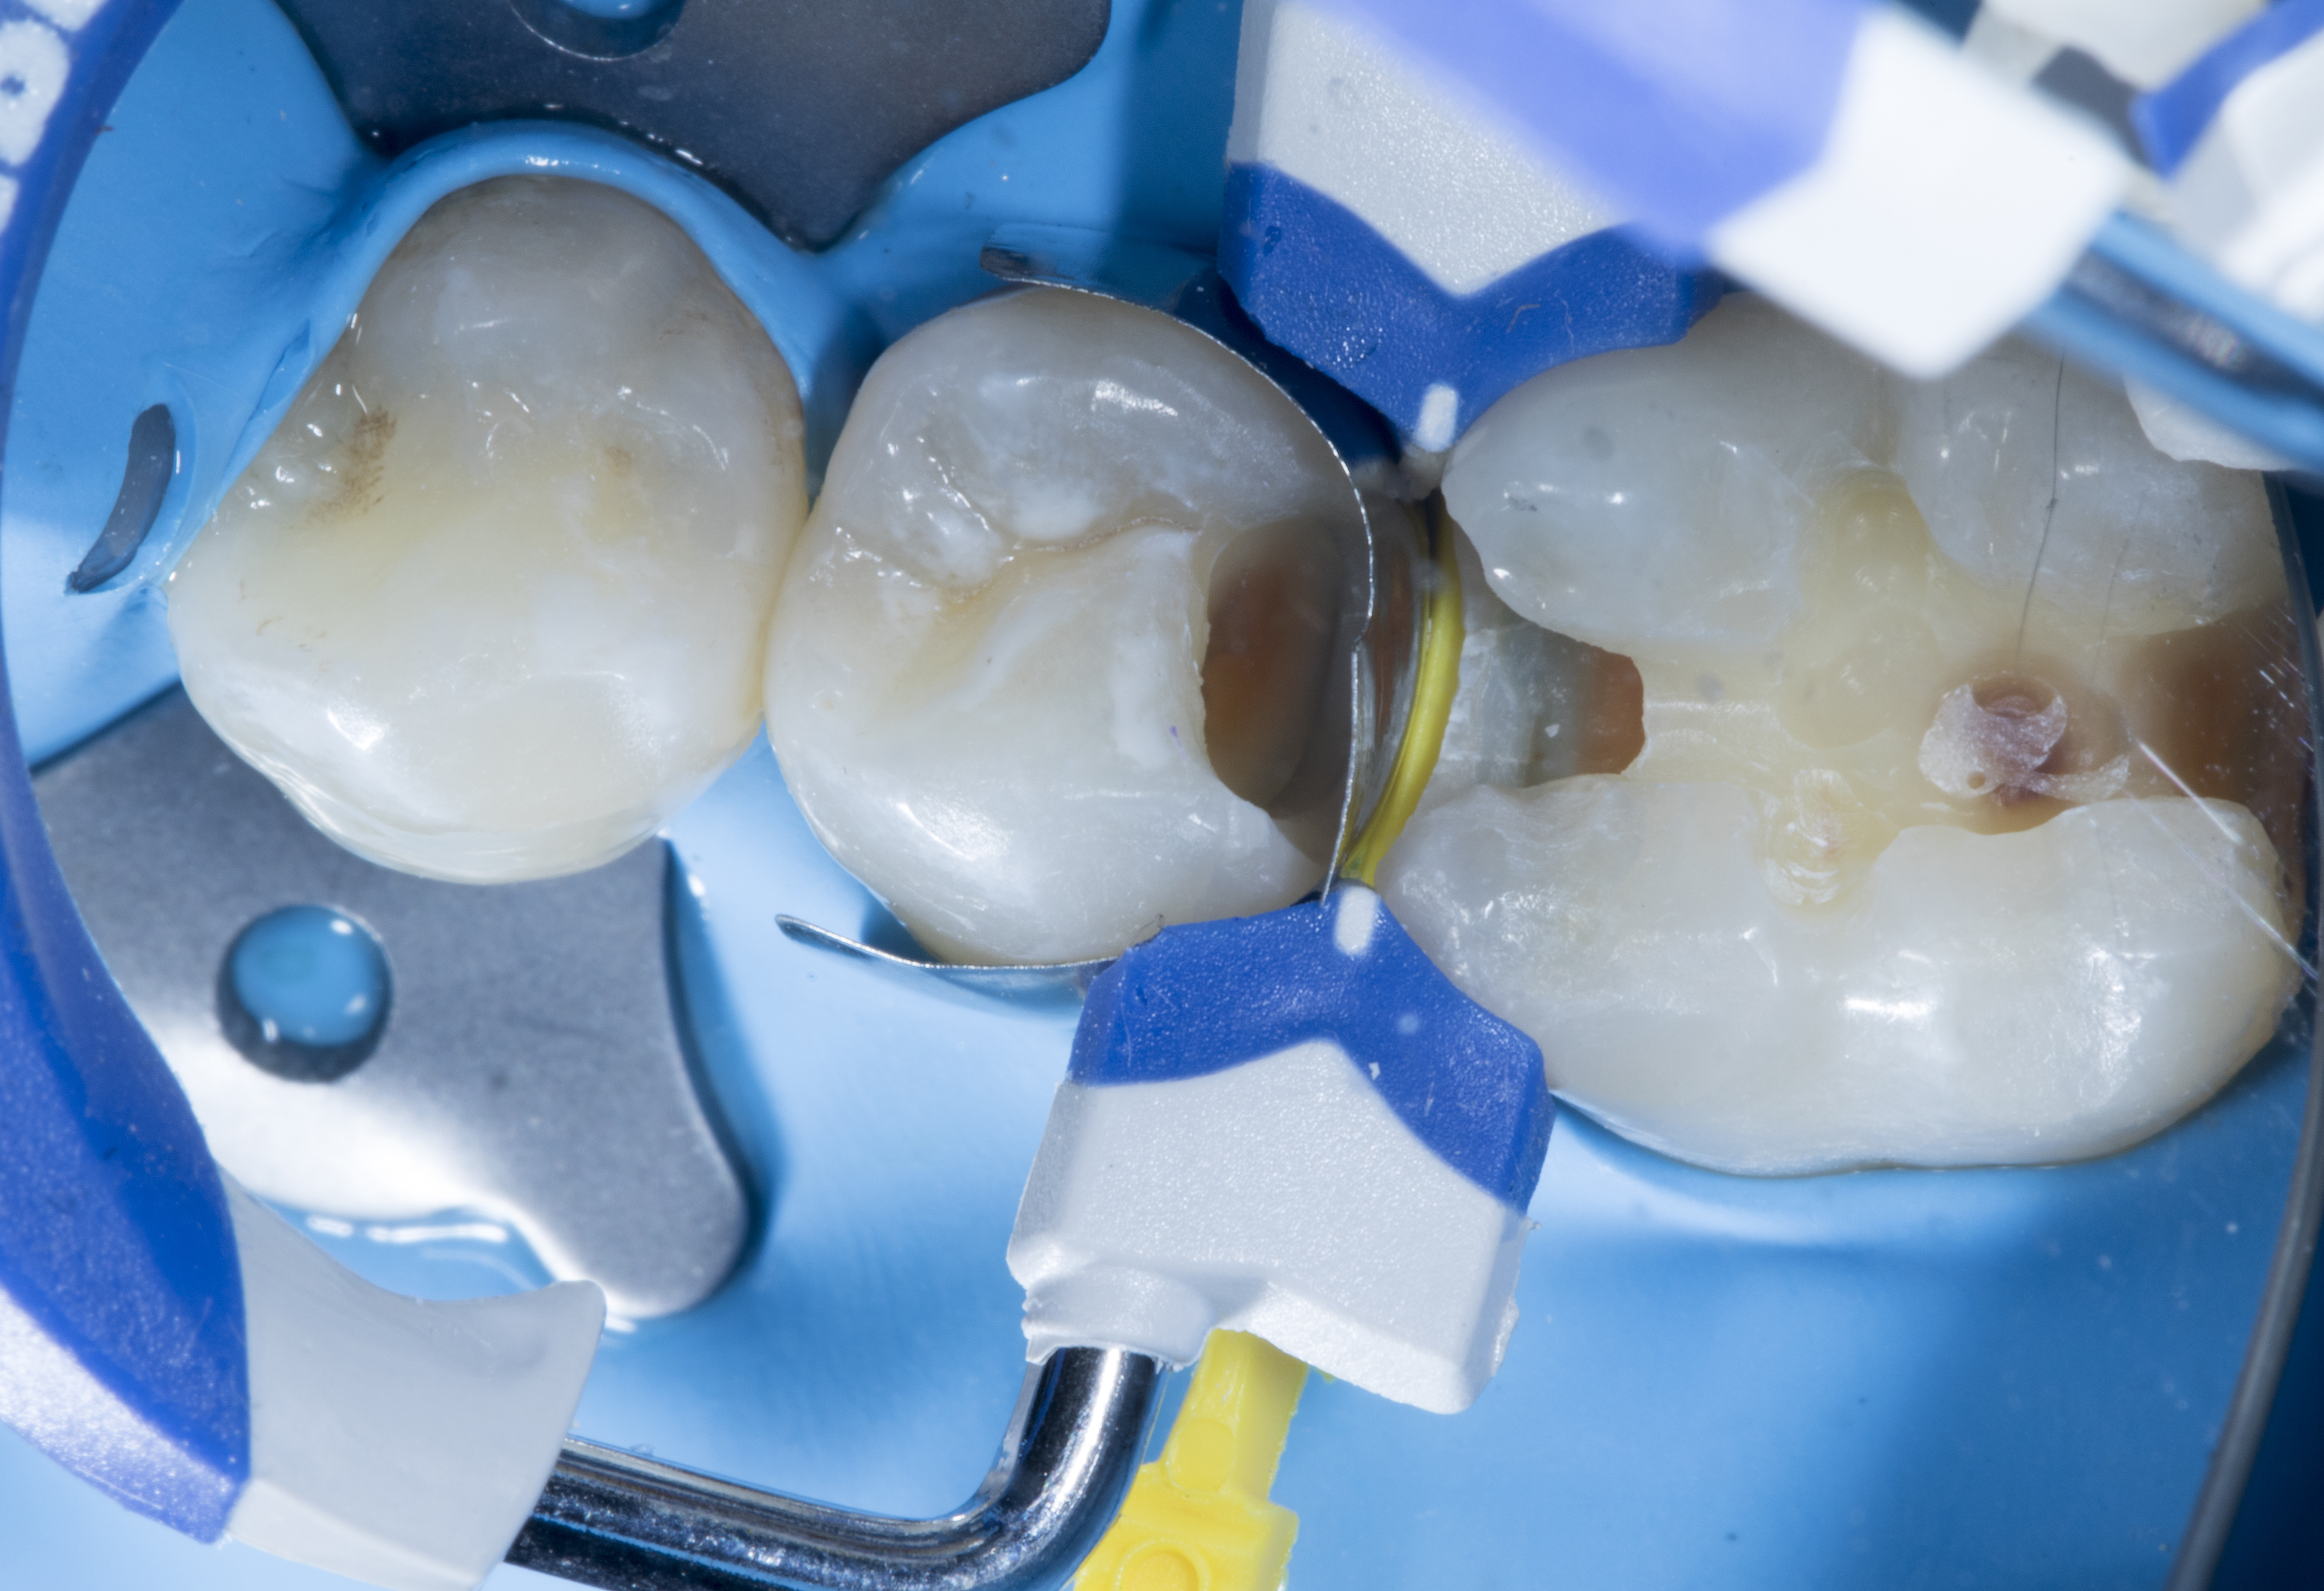
A Garrison pre-contoured premolar FX100 (gray) matrix band was placed in between #35 and #36. Then an extra small (yellow) Fusion Wedge was placed in between. This provides a wedging effect and sealing of the band with the proximal box so that when composite is placed in the box it won't flow excessively beyond the band. This is the most common failure seen in Class II’s. Additionally, the wedge stabilizes the band during ring placement (Composi-Tight 3D Fusion FX400 blue, short ring), preventing the band from moving. This is the most important step in doing perfect Class II restorations.
|
|
| Figure 4. A Garrison pre-contour premolar FX100 (grey) band was placed in between #35 and #36 along with an extra small (yellow) Fusion Wedge. |
Step 5 - After placing the band, a routine procedure of selective etching was completed with 32% phosphoric acid etchant. Shofu 6th generation FL bond II primer and bond was then applied and photo cured as per instructions. A small amount of Shofu Beautiful Bulk Flow dentin shade was placed in the proximal box. (Do NOT photo cure) Due to its low viscosity, this material provides an excellent adaptation to irregular cavity geometry. Next, a small amount of Beautifil LS II dentin shade A2 was placed in the proximal wall with a plastic composite instrument to create a perfect wall following the contour of the band and then photo cured.
Clinical tip: With this technique, the cavo surface margins can be sealed perfectly, with no air bubbles or under filled areas ensuring a tight seal in the proximal box.
|
|
| Figure 5. Proximal wall was built with Beautifil LS II (Shofu) dentin shade A2, you can clearly see the natural contour. |
Step 6 – After removal of the band and the ring, you can appreciate the nice natural contour of the tooth. (Pic 05) The remainder of the cavity was filled in increments with Shofu Beautiful II LS dentin A2 shade. Some individual characterisations were created using white stains to mimic natural hypoplastic areas of the tooth. Build-up of the final enamel layer was done with Shofu Beautiful II LS Incisal shade. Anatomical form of the natural tooth was achieved during build-up of the restoration and photo cured. The final photo cure was done with Glycerine to avoid formation of the oxygen-inhibited layer on the composite.
|
|
| Figure 6. The cavity was filled with dentin shade and final layer enamel shade mimicking natural anatomy with some hypoplastic white stains. |
Step 7 - Finishing and polishing of the proximal wall was done with the help of Super-Snap Purple disk, followed by Super-Snap X-Treme Green disk and Pink disk.
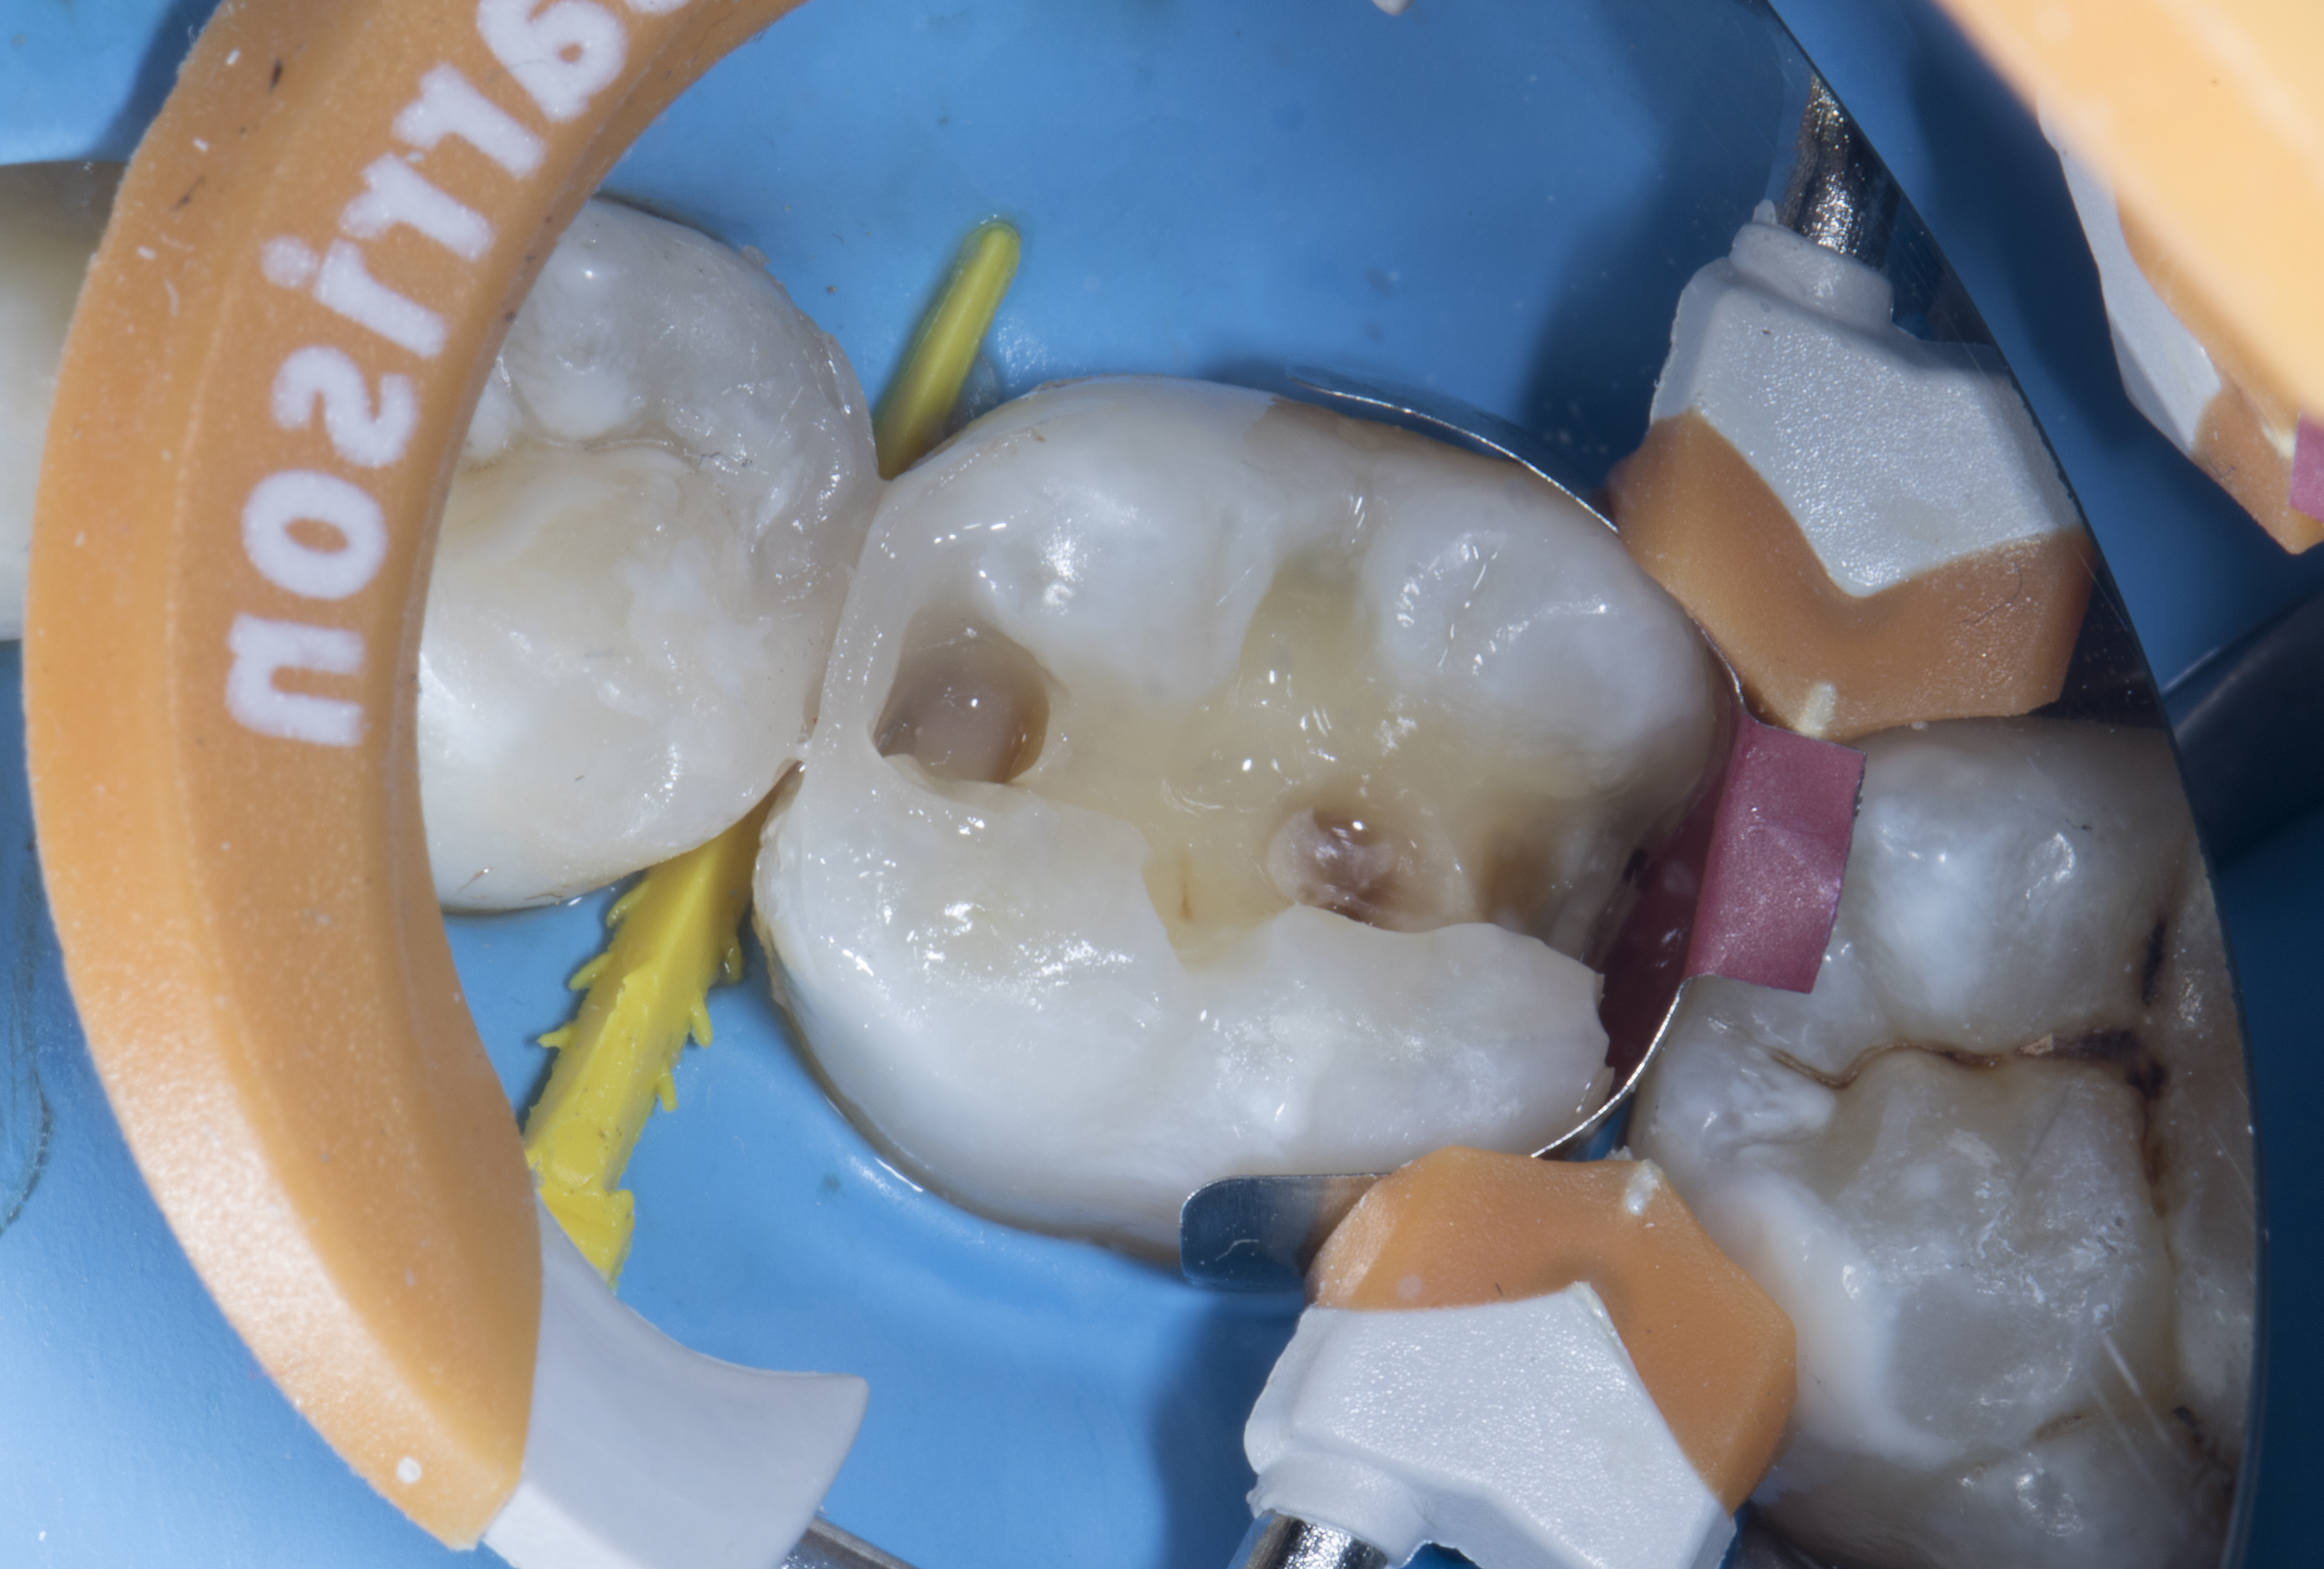
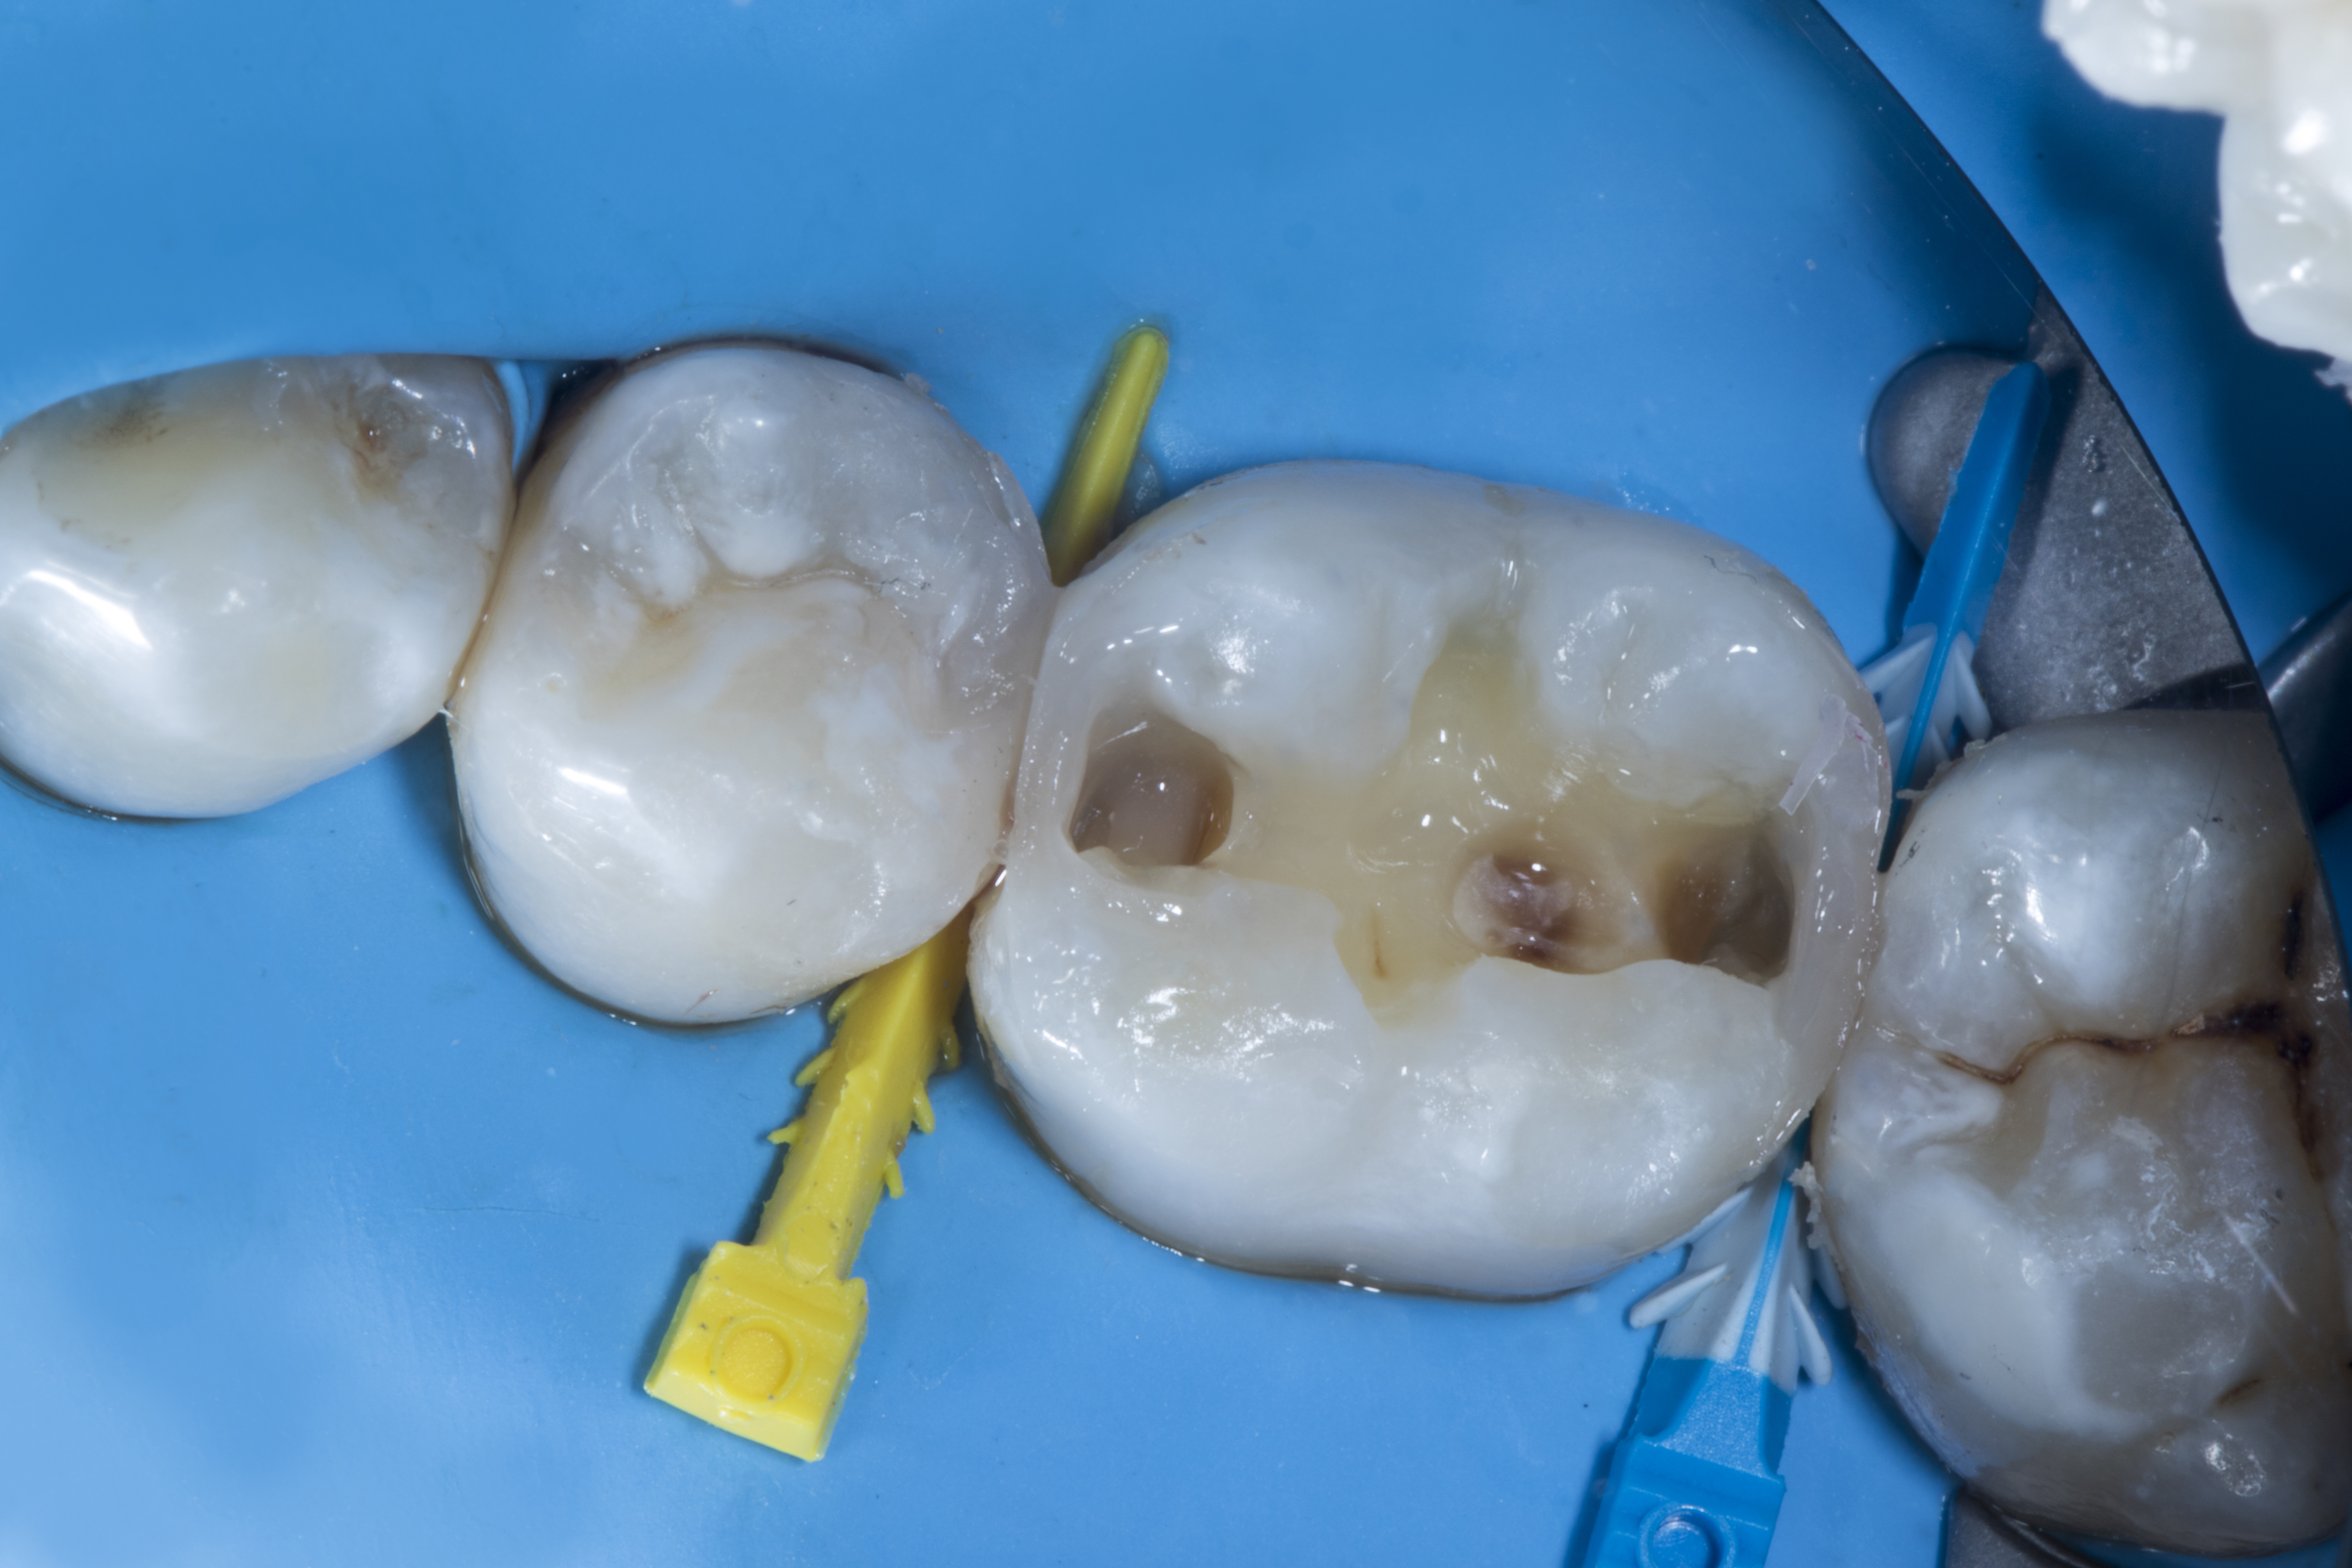
Step 8 - Restoration of tooth #36. A tall molar FX300 (blue) band selected for mesial and FX150 (red) band selected for the distal-proximal box. The bands were stabilized with extra small (yellow) and small (blue) Fusion Wedges respectively. The bands were selected as per the height of the proximal box on each side. The tab on the marginal aspect of the FX300 band was bent over the adjacent tooth so that the height of the proximal wall is known. The FX400 (blue, short) ring was placed and the proximal wall / mesial contact built up with composite the same as described earlier in Step 5.
|
|
| Figure 7. A tall molar FX300 (green) band was selected for mesial and FX150 (red) band for the distal-proximal box. Both bands were stabilized with extra small (yellow) and small (blue) Fusion Wedges respectively. Then a FX400 (blue, short) ring was placed and the proximal wall / mesial contact was built up. |
Step 9 - Making distal contact with the FX500 (orange, tall) ring was described in step 5.
|
|
| Figure 8. Making distal contact with a FX500 (orange, tall) ring. |
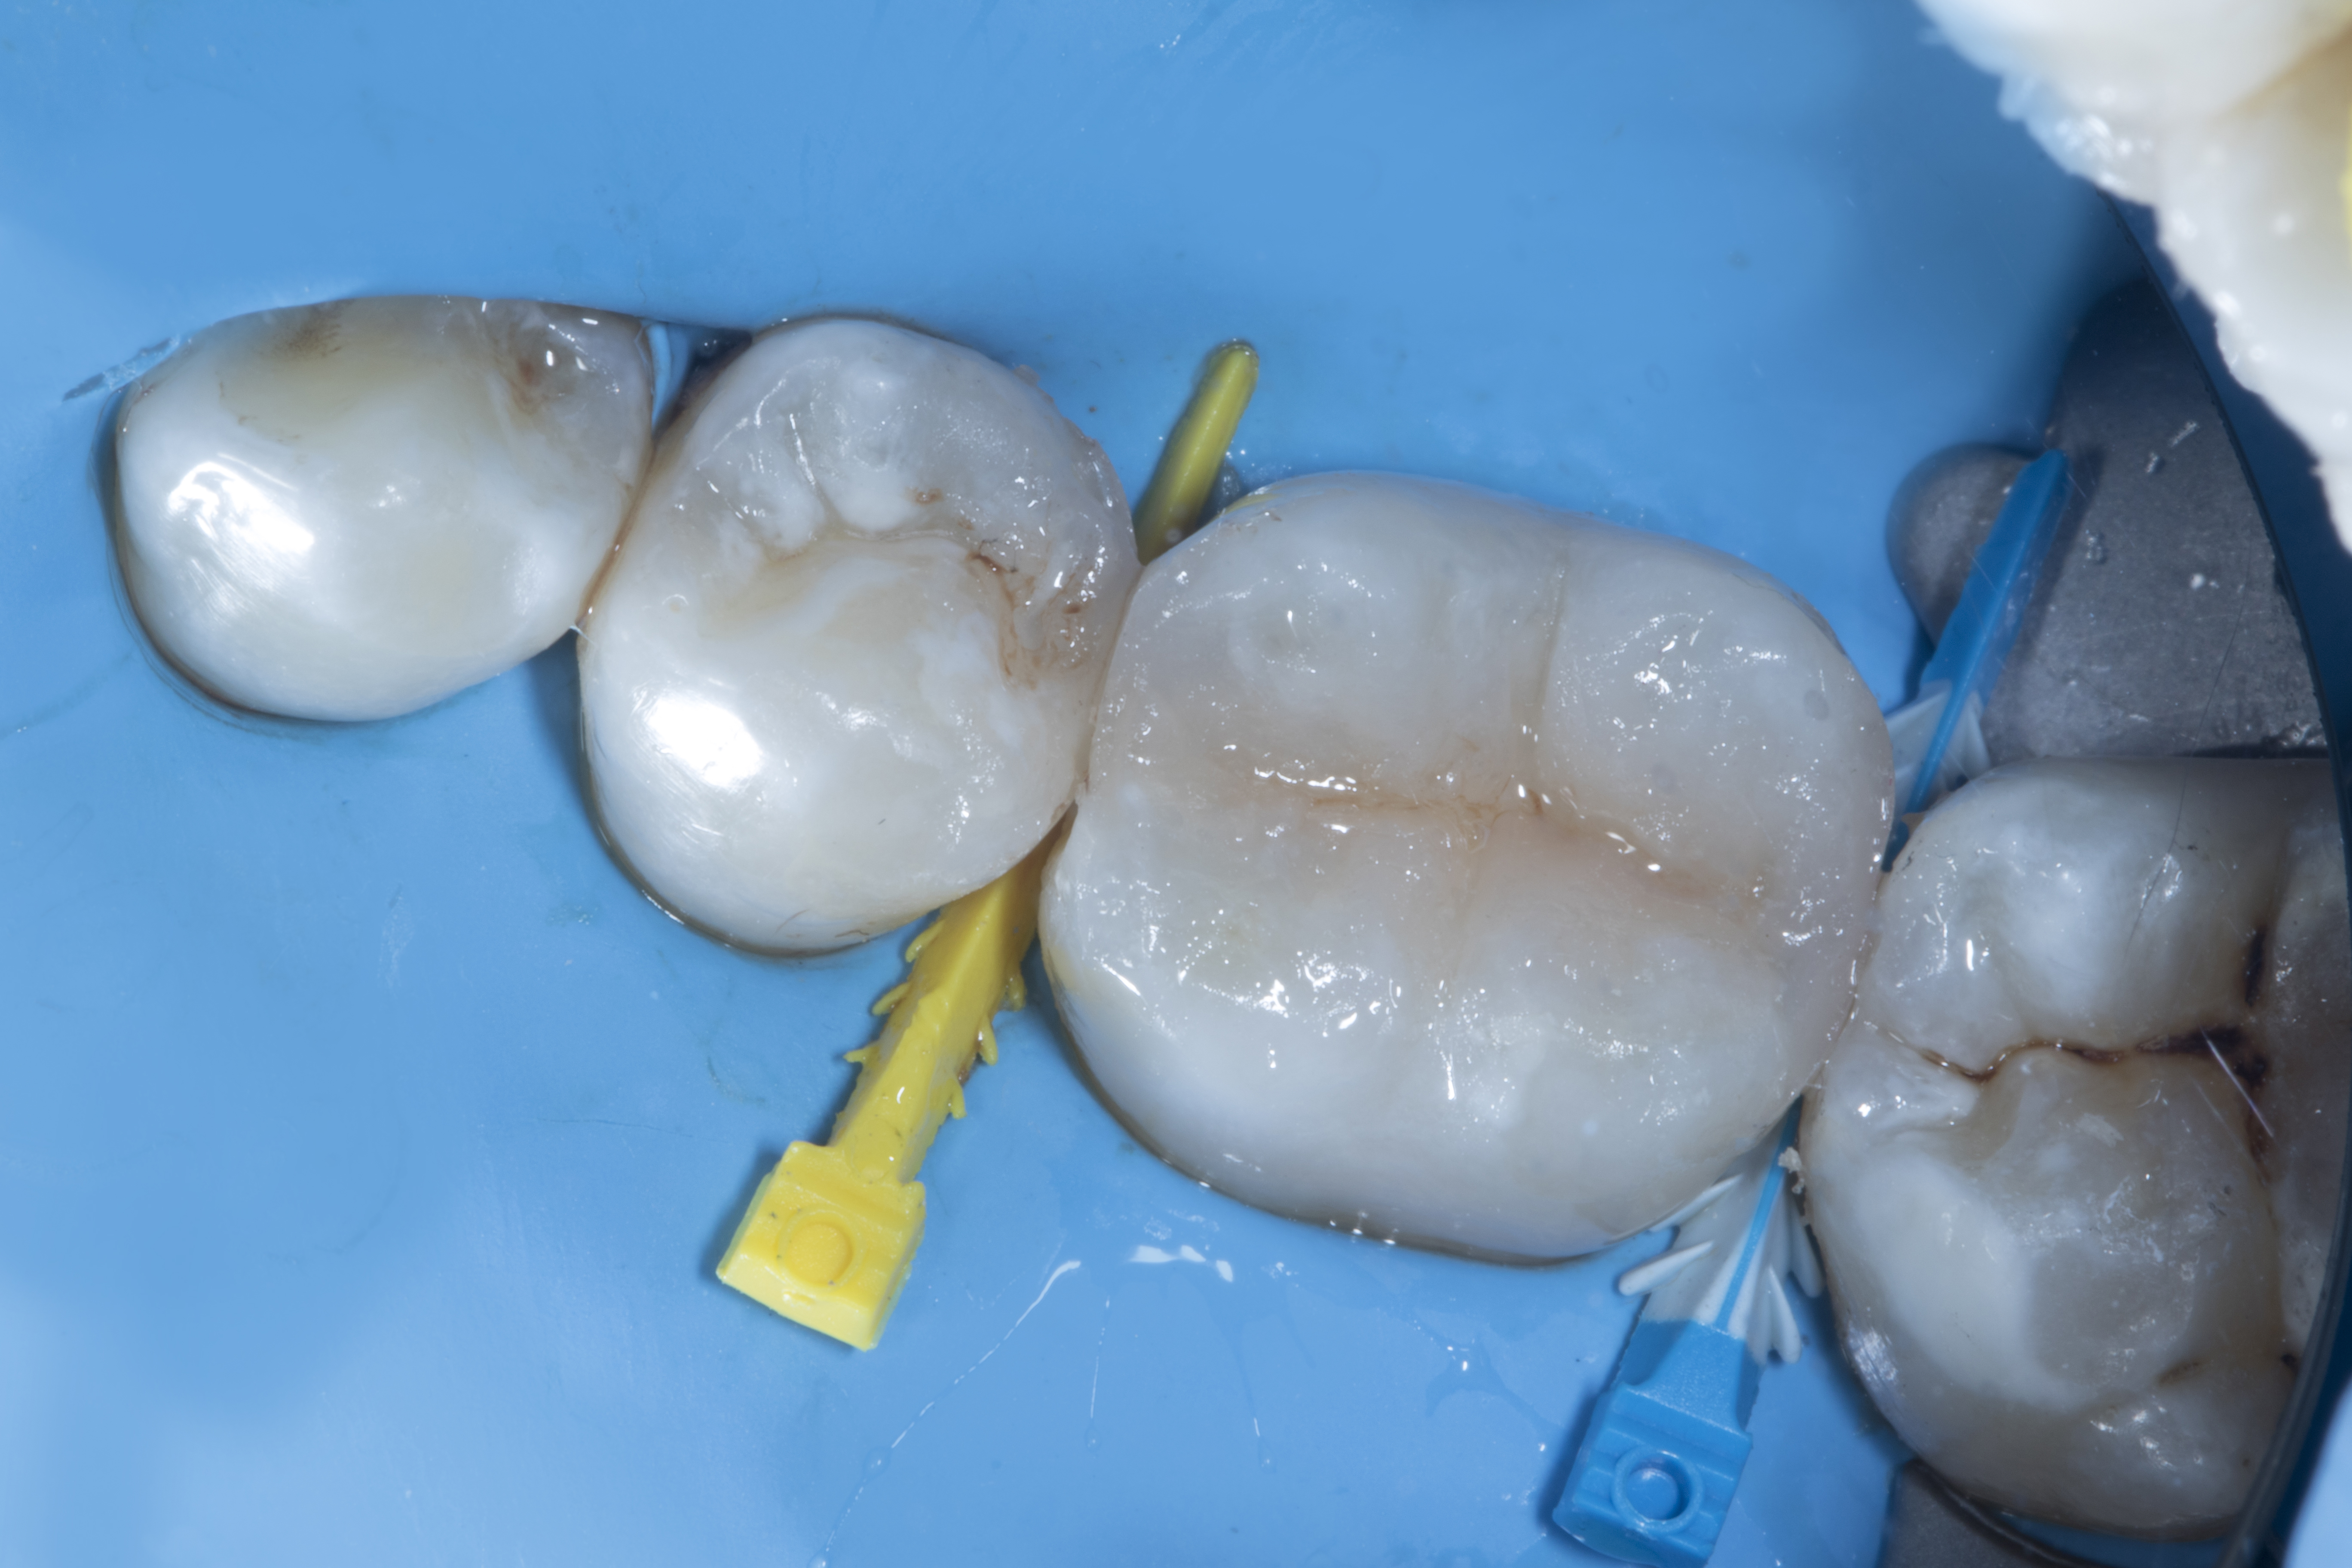
Step 10 – After removal of all rings and bands the resulting Class I cavity was filled with composite (Shofu Beautifil II LS) in small increments to avoid C factor, while mimicking natural anatomy. Brown stains were added to give a natural effect.
|
|
|
| Figure 9. After removal of all rings and bands, the resulting Class I restoration is now ready for filling. | Figure 10. The cavity was filled with composite Beautifil II LS (Shofu) in small increments to avoid C factor, while mimicking natural anatomy. Brown stains were added to give a natural effect. |
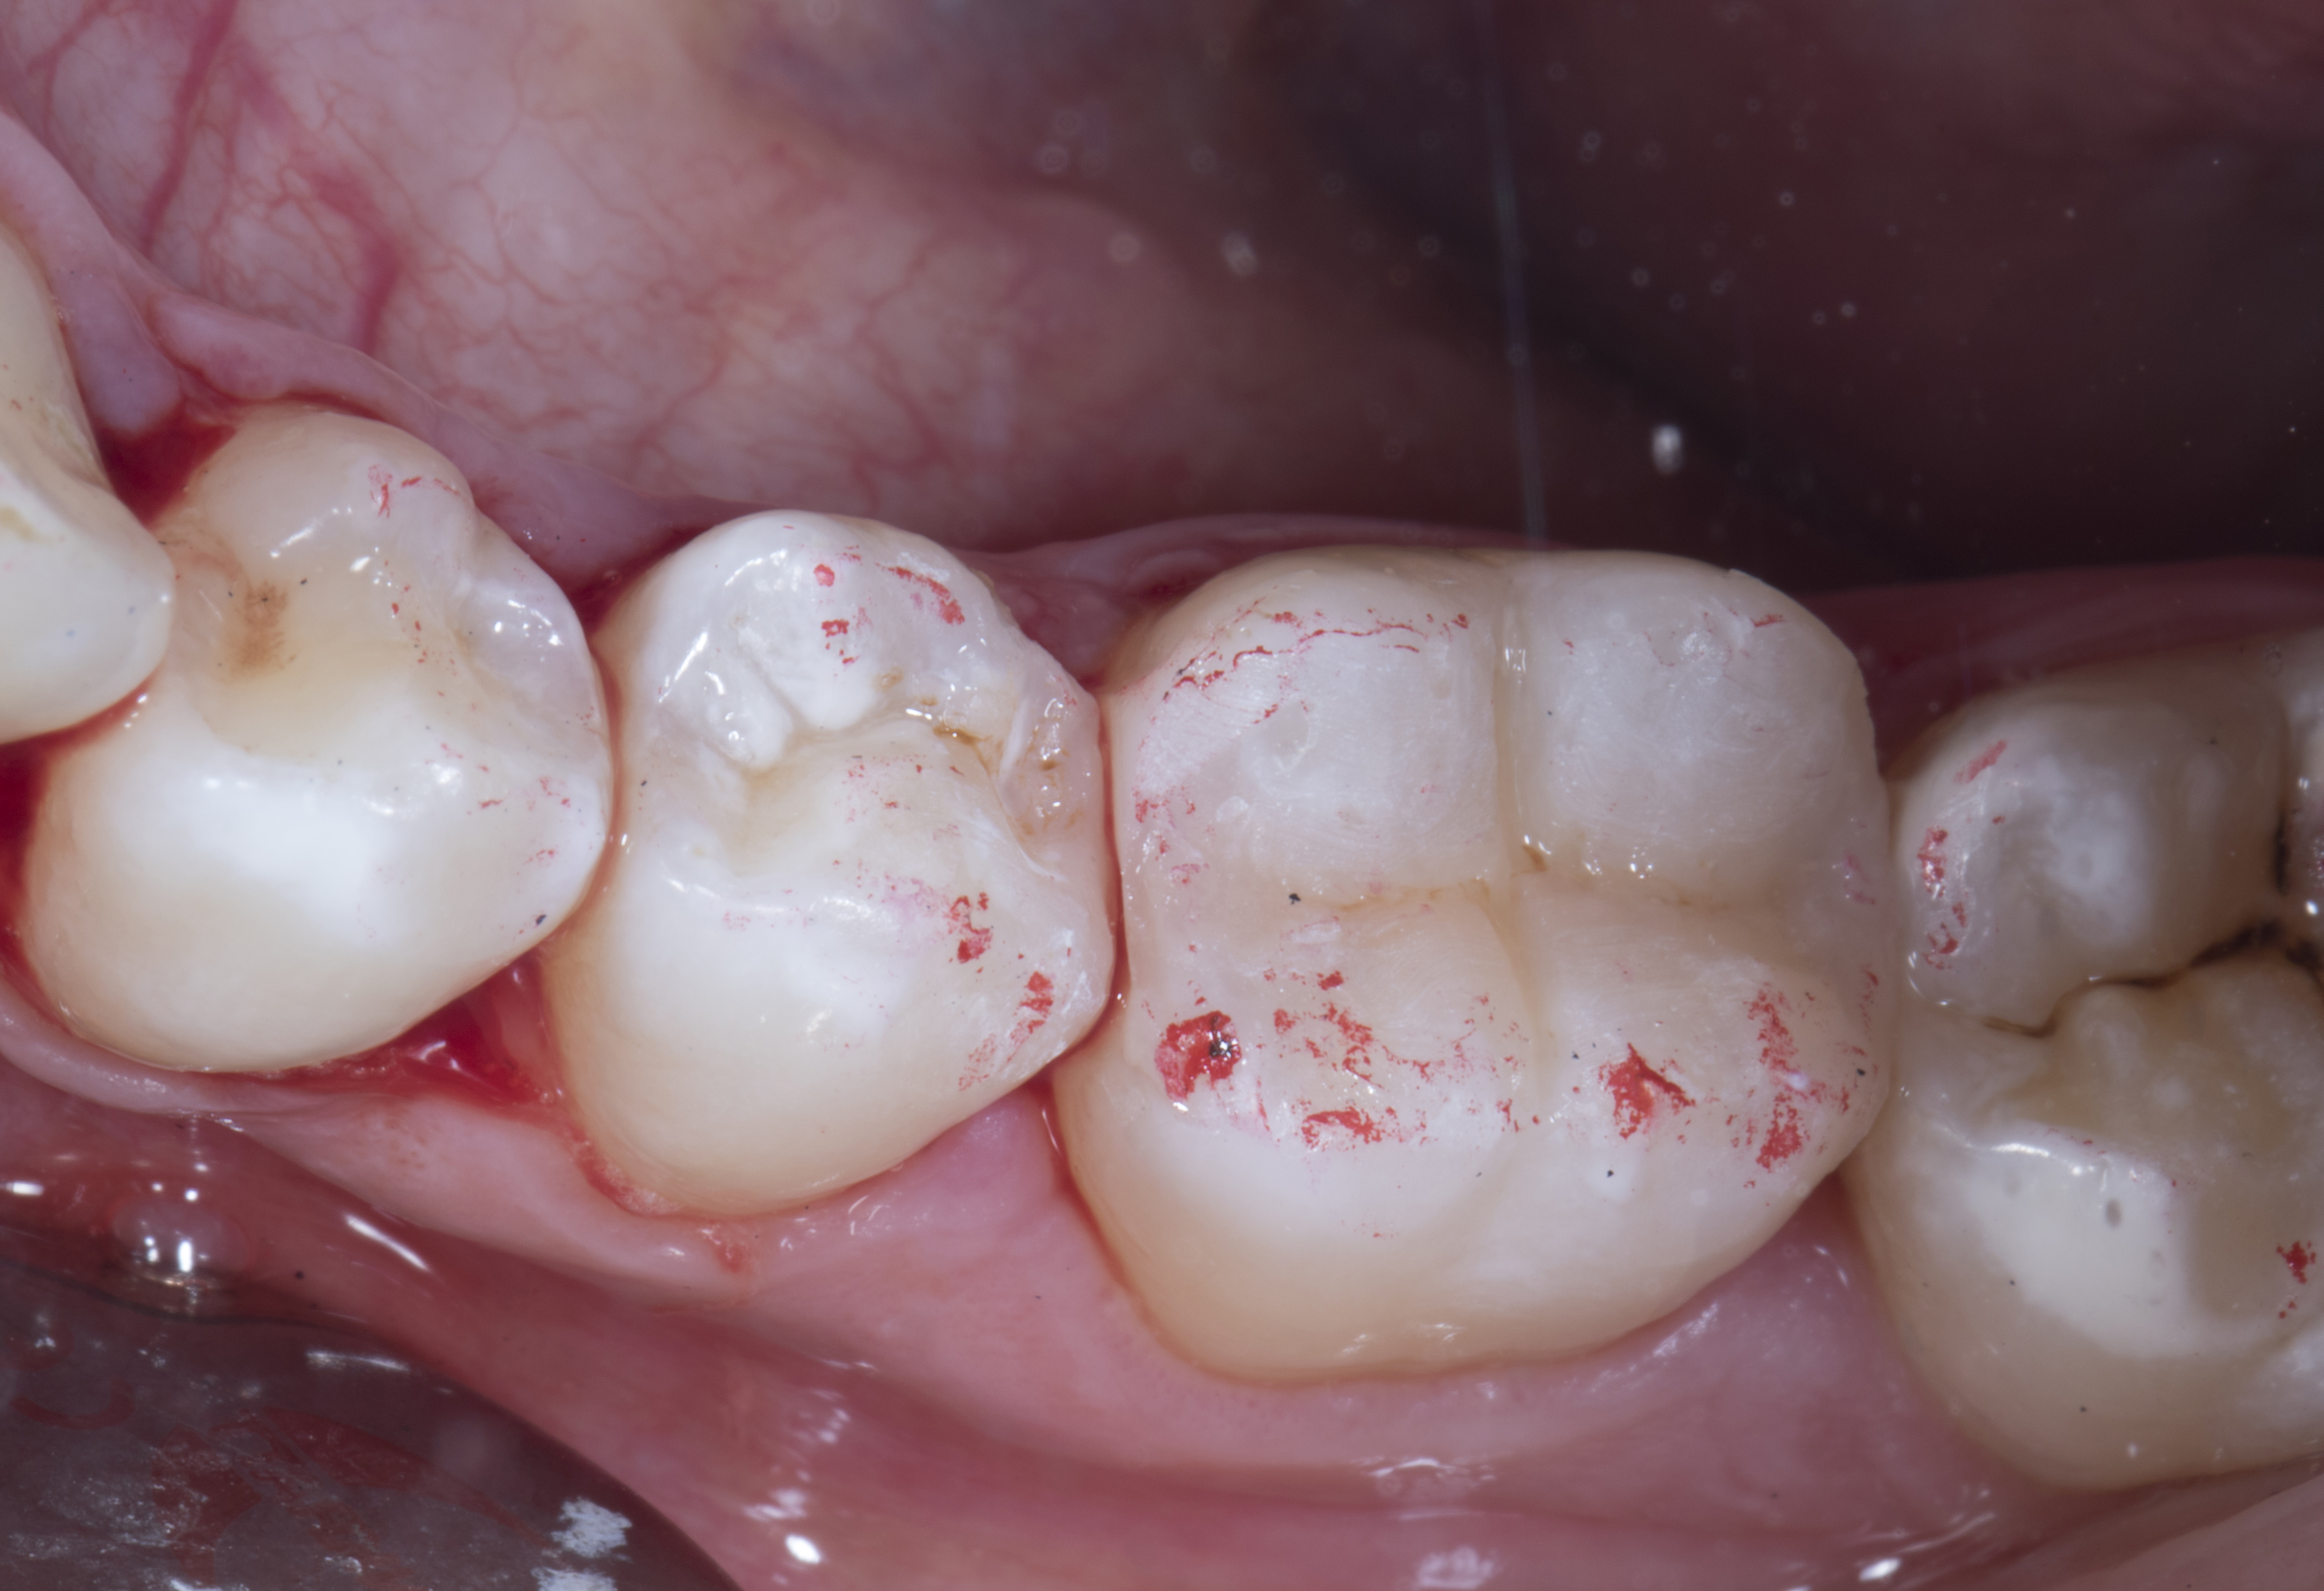
Step 11 – The rubber dam was removed and occlusion checked with 40 micron articulating paper in static occlusion and again in dynamic occlusion with patient in upright position.
|
|
| Figure 11. Rubber dam was removed and occlusion checked with 40 micron articulating paper in static occlusion. |
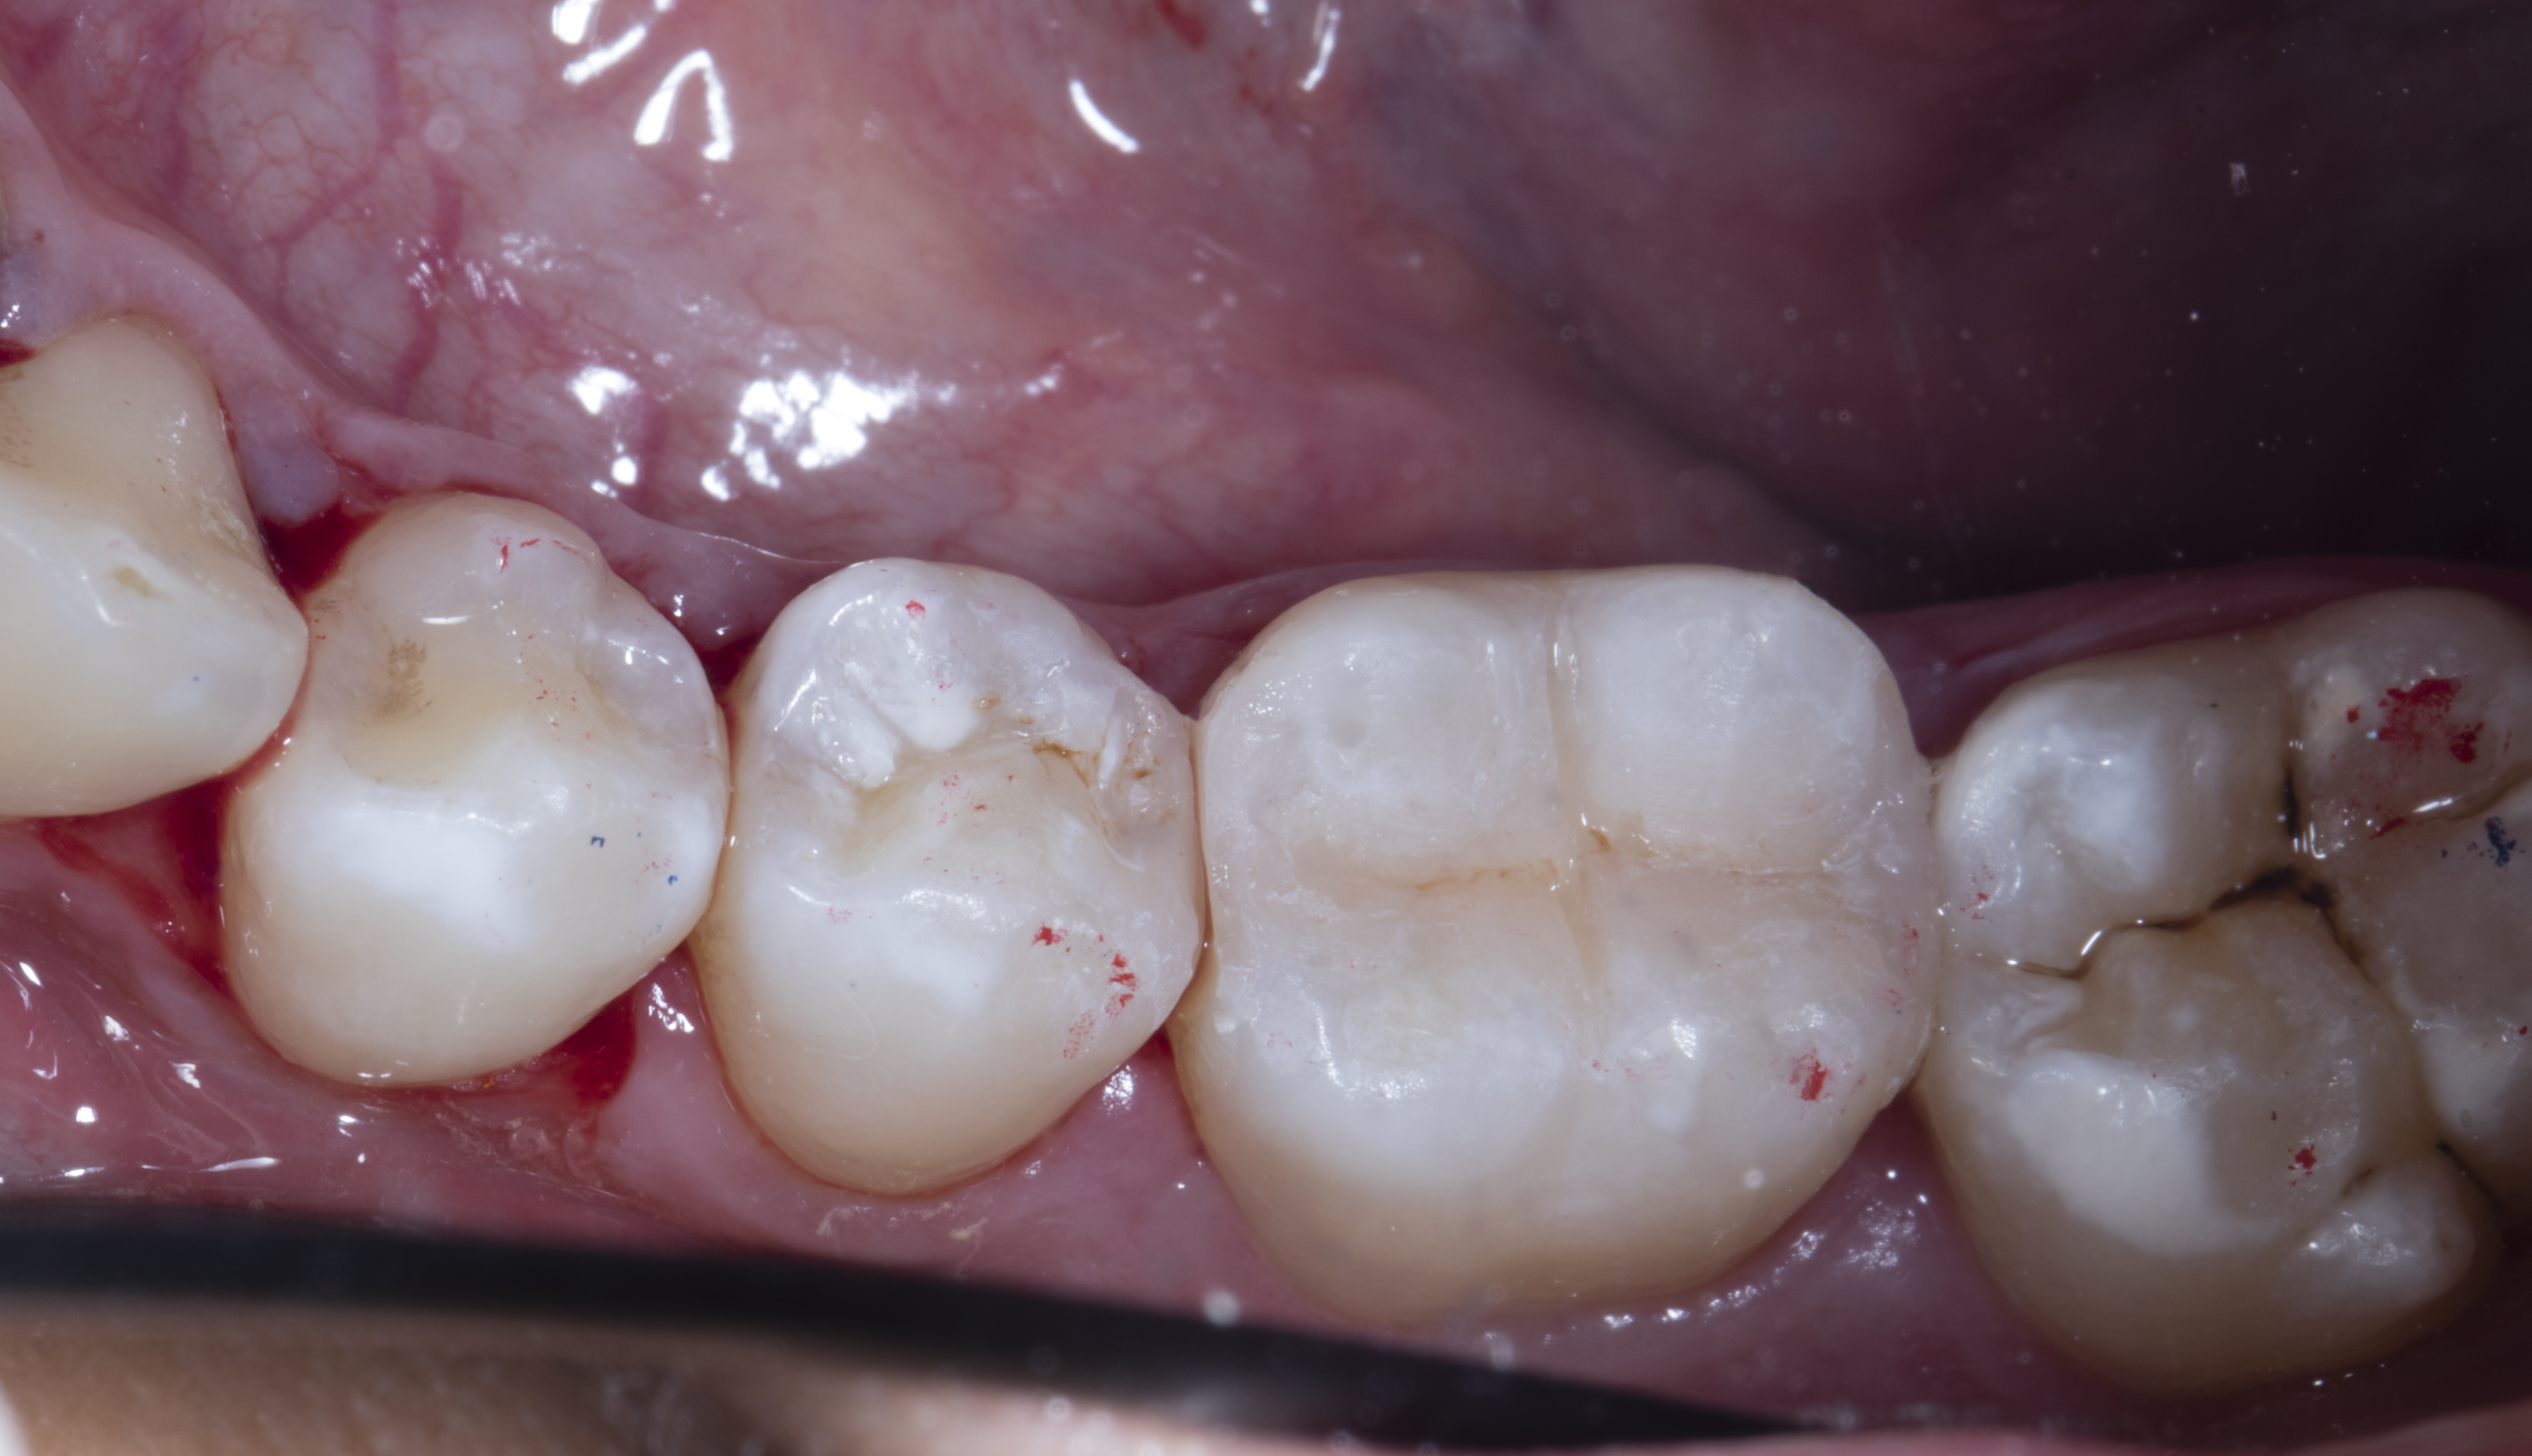
Step 12 - Finishing and polishing was done using Shofu OneGloss, aluminium oxide impregnated silicone polisher. A Super Buff disk was used after soaking in water for 20-30 seconds to achieve the final high gloss.
|
|
| Figure 12. After finishing and polishing. |