Case Details:
Full Size Image
Full Size Image
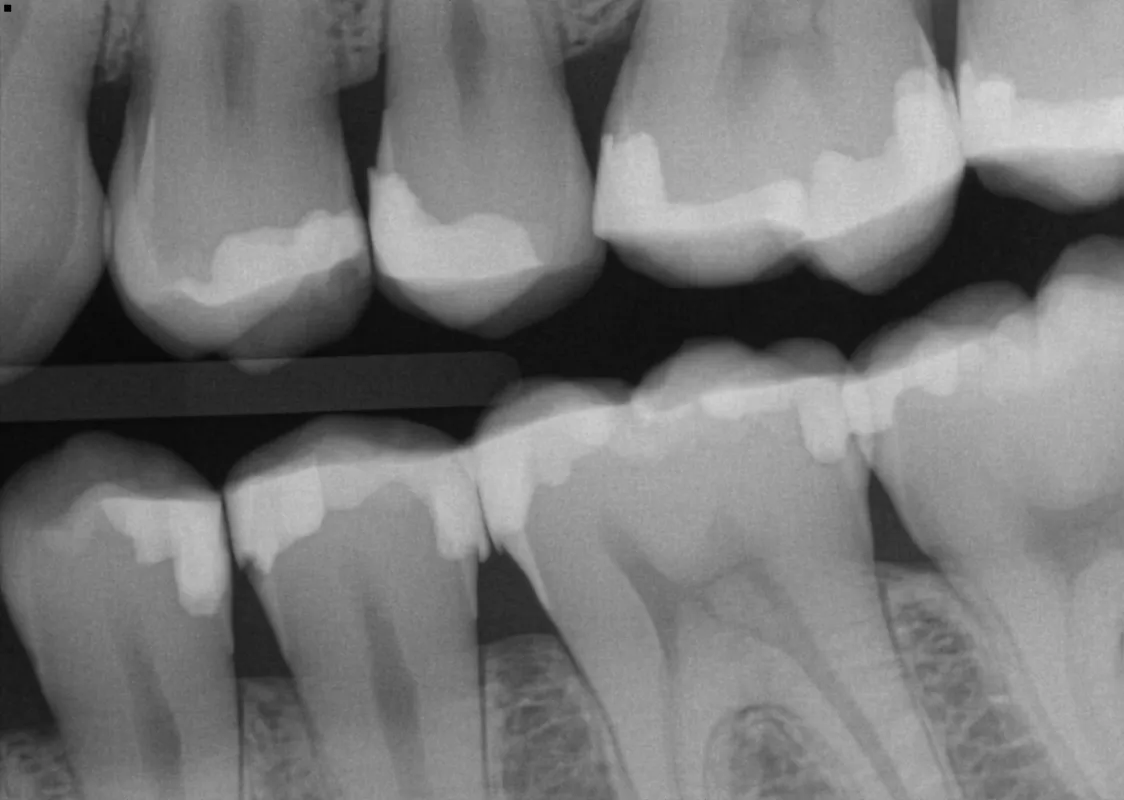
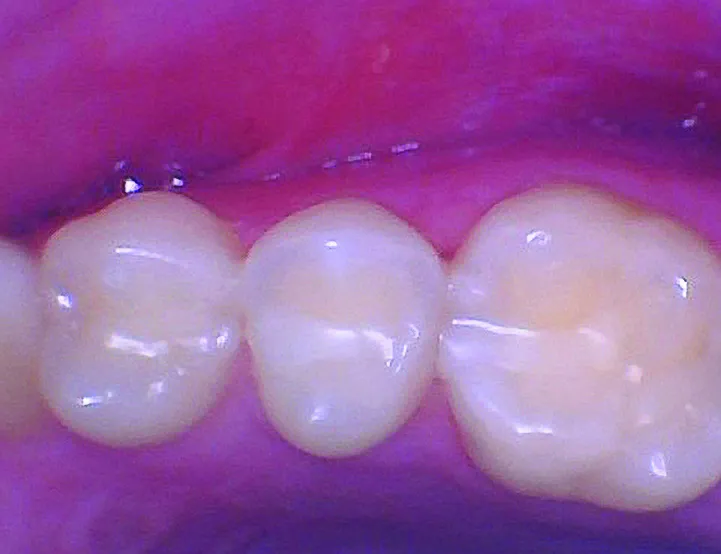
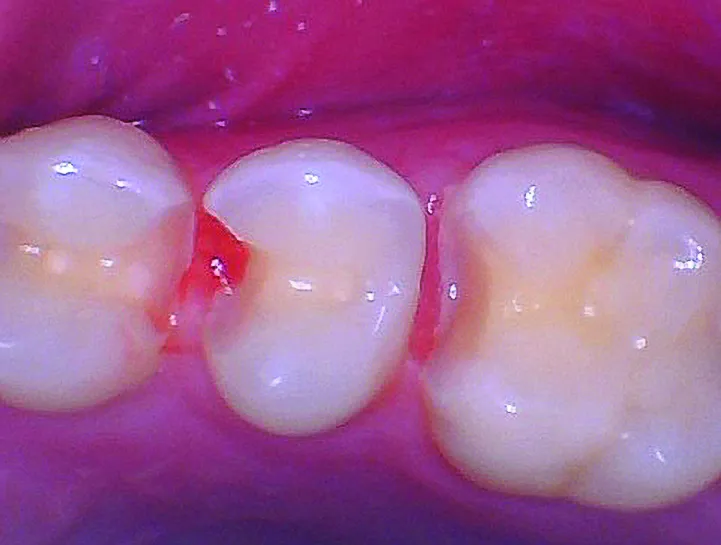
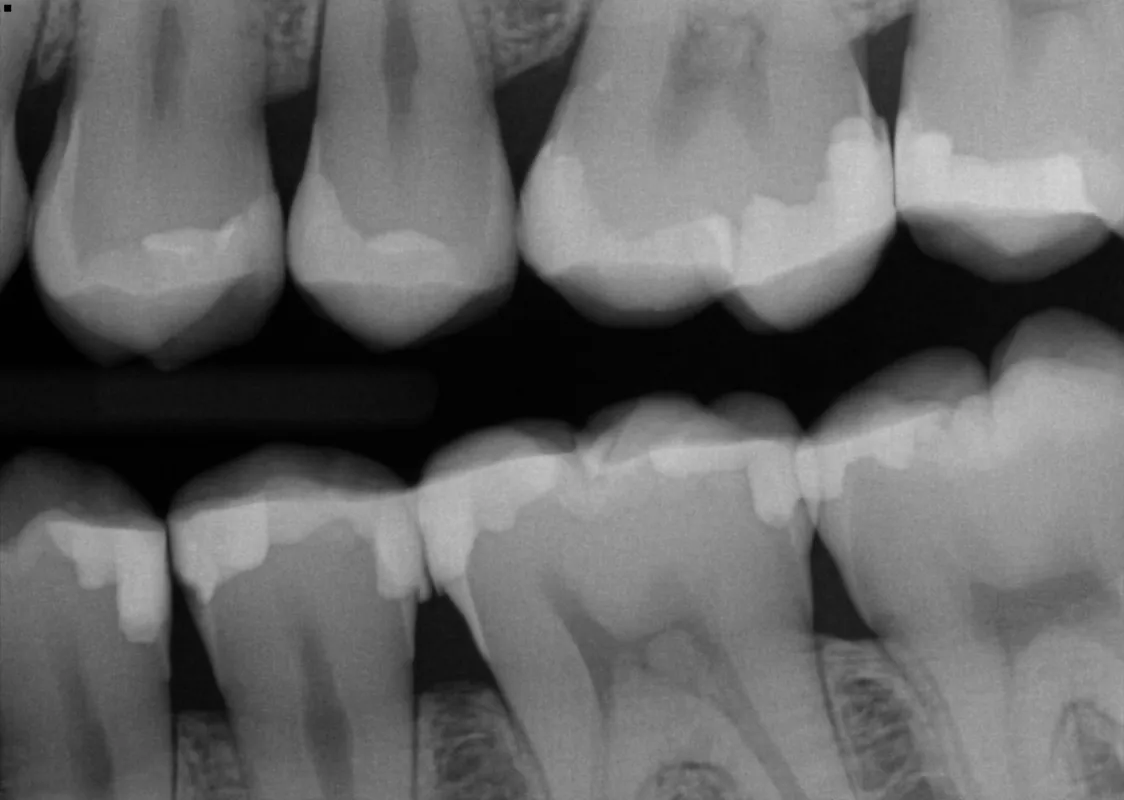
Patient is a 20-year-old male with failing composite restorations. He reports the restorations were done about two years ago, and he keeps getting food stuck when he eats. Clinical and radiographic exam shows failing existing Class II direct restorations. Open contacts were present, along with chipped marginal ridge forms. This was causing food impaction, secondary caries, and gingival irritation/inflammation. Furthermore, there are multiple overhanging margins present, which irritate the gingival tissues and trap food, resulting in Class II restoration failure. Since the upper left was the most sensitive area for the patient, we elected to begin with #14–MO, #13–MO & #12–DO.
Full Size Image
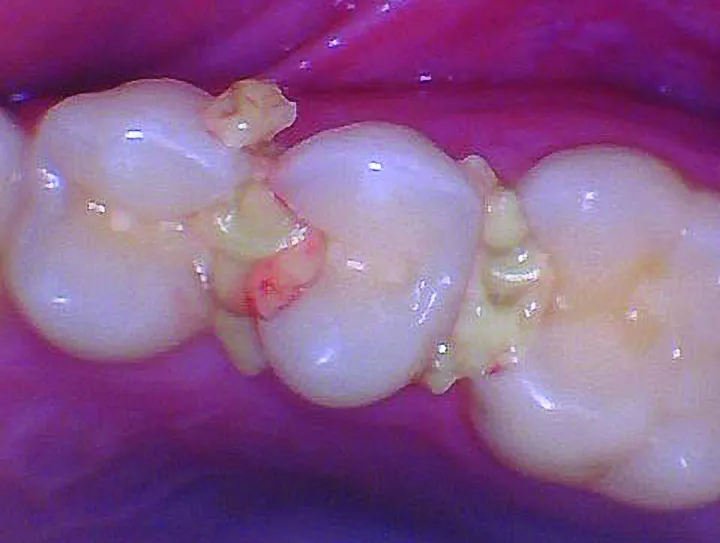
Patient was anesthetized and failing composite restorations were removed with an 856-016 diamond bur. The margins were finished with a Meisinger Fine Flame. All contacts were broken. As is common with failing Class II composite restoration removal, the gingival tissue was very inflamed and irritated. It is important to get this under control for improved vision and access to the restorative field.
Full Size Image
A hemostatic paste, Traxodent, was placed on the irritated gingival tissues for three minutes and then rinsed off.
Full Size Image
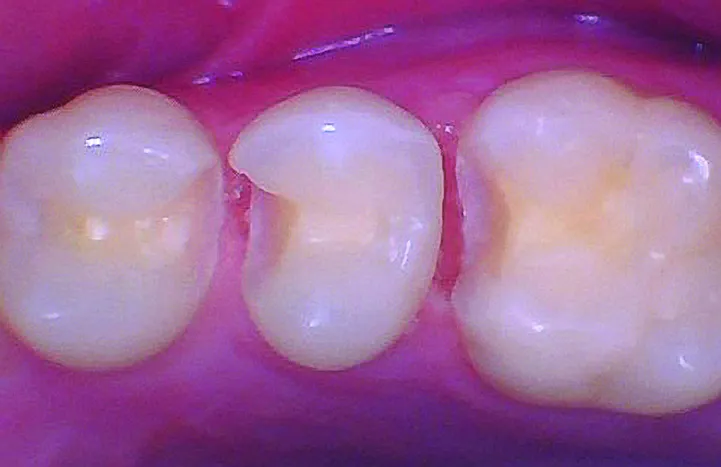
Field is now clear and the gingival tissues are under control for restoration placement. Notice the concave shape to the mesial gingival margin of #14. These slight concavities are difficult to seal and can result in flash or contamination of the restorative filed. Furthermore, if you look at this image, along with the pre-op bitewing, you will notice the uneven margins on #12–DO and #13–MO. When performing back-to-back restorations, uneven margins are common and can be difficult to securely wedge/seal both margins with a single wedge.
Full Size Image
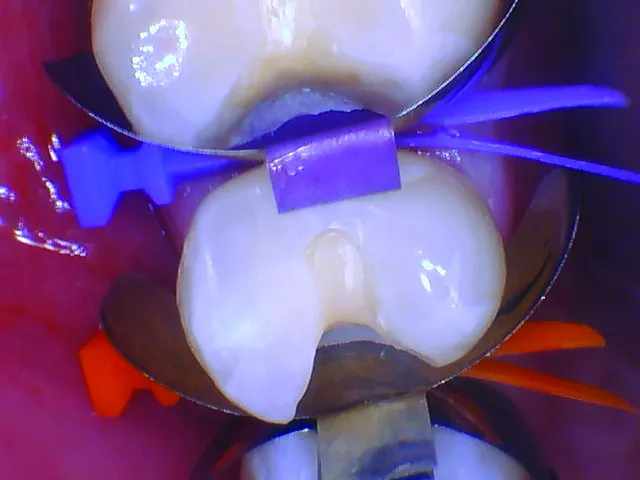
Vitrebond Line was placed on the dentin of #12, 13, and 14. The teeth were etched with 35% acid for 30 seconds and rinsed. The matrix bands and wedges were placed. Since #14 was an isolated (non-back-to-back), a 3D Fusion™ Matrix band was utilized. With the concave gingival margin shape, an anatomical Quad Wedge was placed (purple). This wedge contains a convex feature, allowing concave shaped gingival margins to be accurately sealed. Image shows a quality seal on the gingival margin #14.
Full Size Image
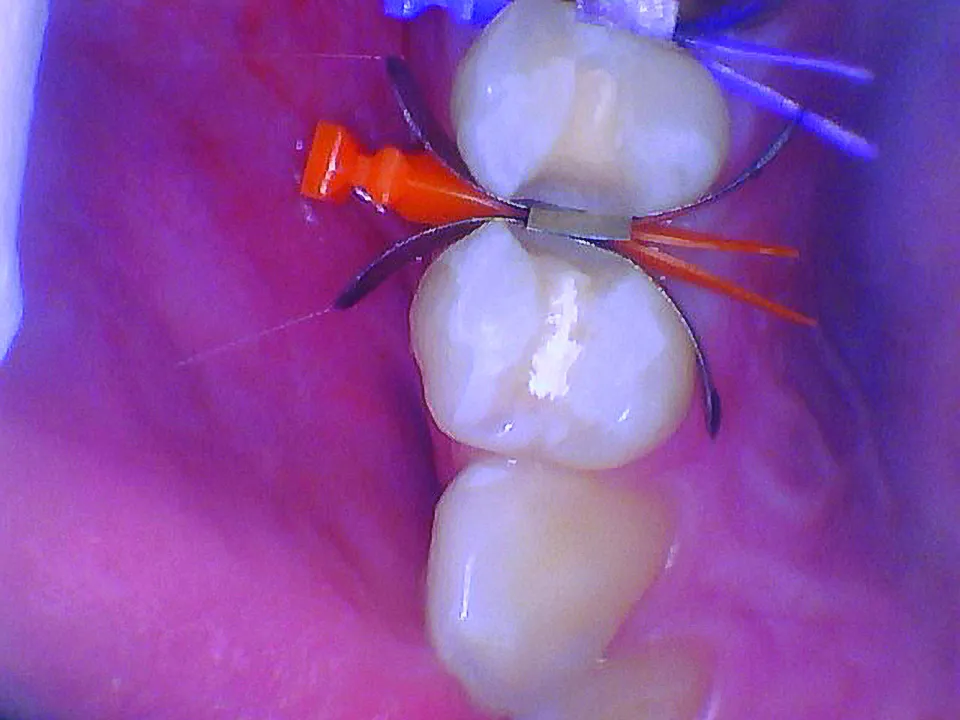
On the #12 and 13 back-to-back Class IIs, 3.5mm Garrison Firm Matrix Bands were placed. The Firm Matrix Bands ensure proper matrix band contour for back-toback situations. A medium Quad Wedge (orange) was placed. Notice how the splitting wing feature of the Quad Wedge allows simultaneous seal of both margins (#12 and #13) with a single wedge.
Full Size Image
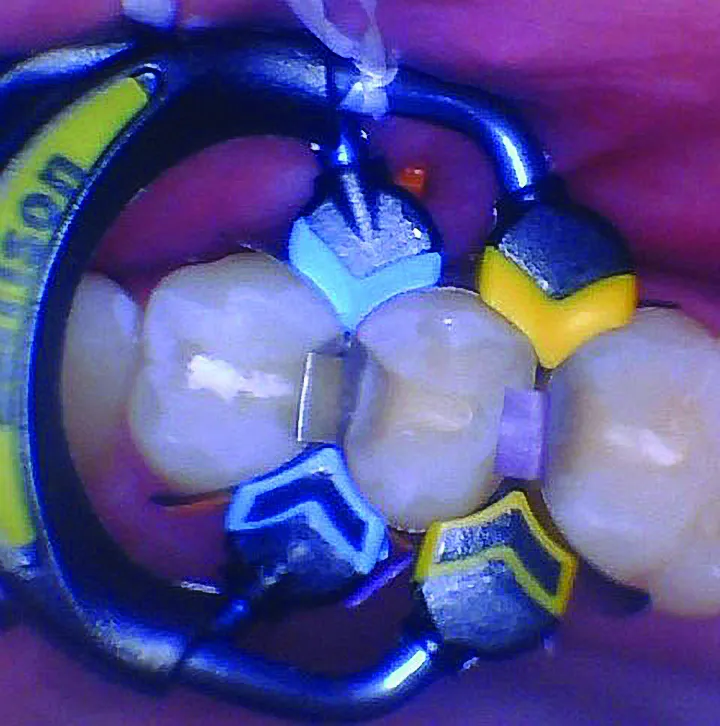
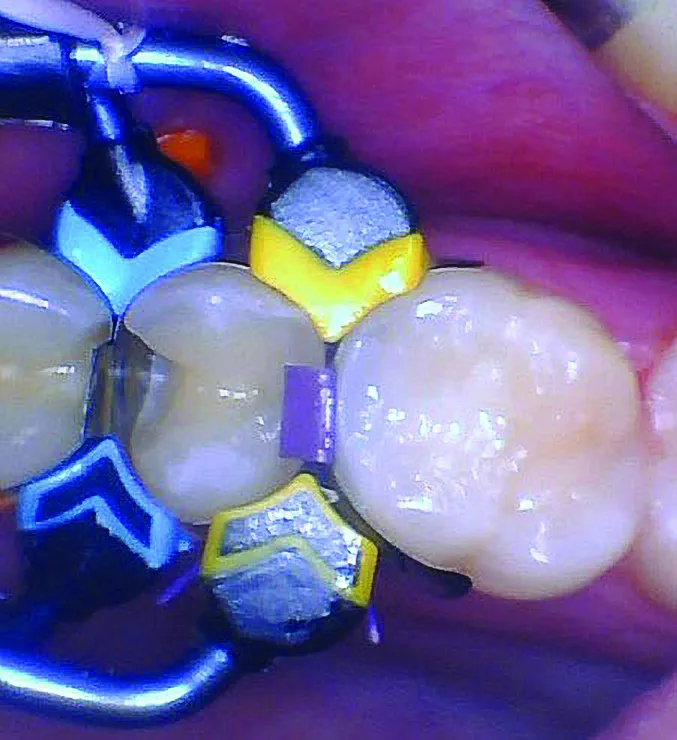
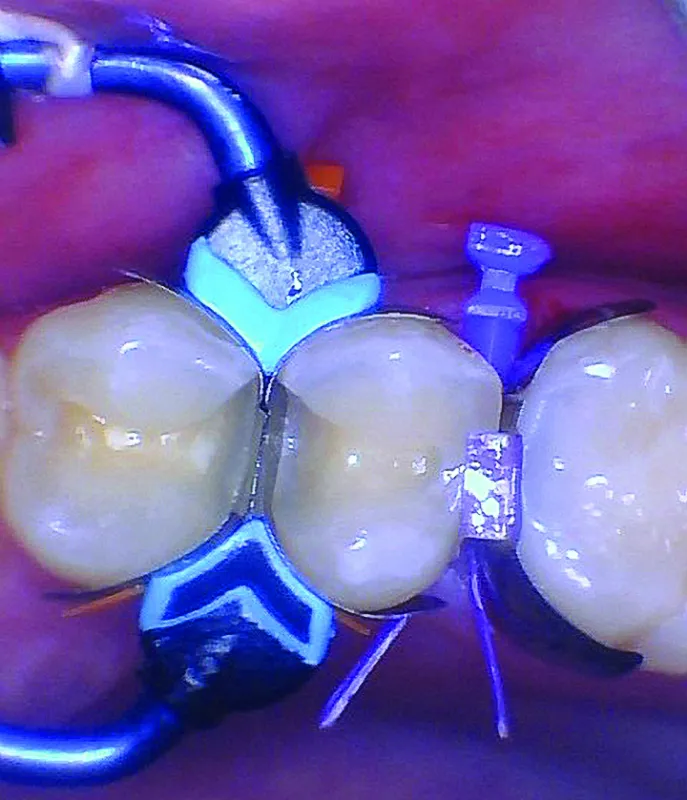
Following matrix and wedge placement, Quad Rings were placed. The first ring placed was the Quad universal ring (blue) in between #12 and 13. The universal ring was placed first, allowing the tall Quad ring (yellow) to sit over the shorter universal ring. The Quad ring has an asymmetrical tip design. The “driver tip,” which is designated by the black arrow on top of the ring pad (see image) is designed to engage in-between the splitting wings of the Quad wedge. This interaction is unique, and allows excellent gingival seal, flash control, and contact formation. Furthermore, the splitting Quad wedge and the Quad ring synergy create an environment for back-toback Class II restorations to be placed simultaneously. Once the rings are in position, a dycal instrument was used to lightly burnish the matrix bands to ensure a smooth surface prior to restoration placement.
Full Size Image
The most distal restoration, #14, was completed first. Scotchbond (3M), Surefil SDR (Dentsply) and Filtek Supreme (3M) were utilized in the restoration. Please note that ScotchBond was placed on all teeth: #12, 13, and 14 at this stage.
Full Size Image
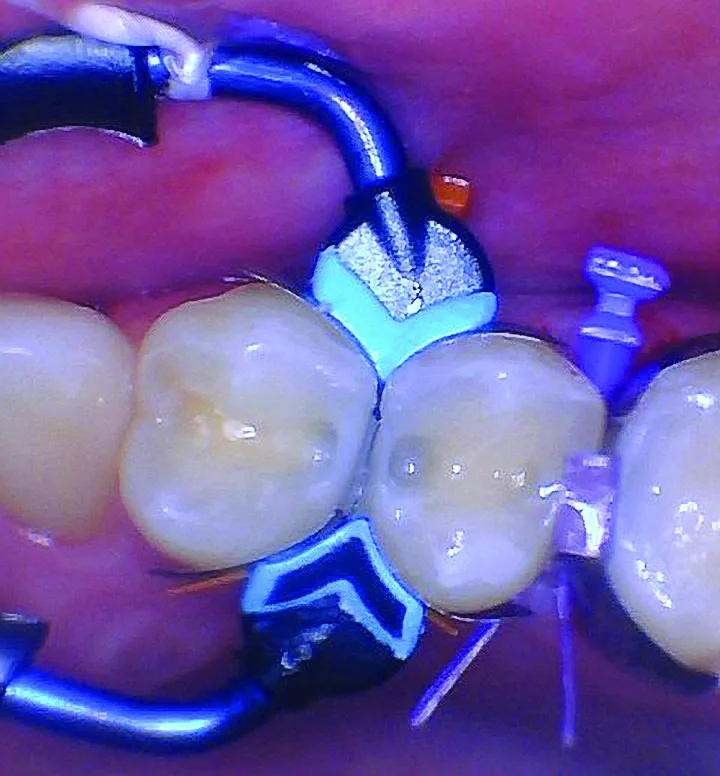
Following polymerization of #14, the Quad ring on #14 was removed. This sequencing in quadrant direct dentistry helps ensure that you achieve adequate ring force separation when placing multiple rings. Following removal of the tall Quad ring (yellow), simultaneous restoration placement in the back-to-back situation #12–13 begins.
Full Size Image
Surefil SDR (Dentsply) is placed in the box, followed immediately by heated Filtek Supreme (3M). This snowplow technique ensures sealed gingival margins and inhibits air bubbles of the restoration material at the margins. The Class II is turned into a Class I. Layering in this way helps decrease polymerization stress on the teeth being restored.
Full Size Image
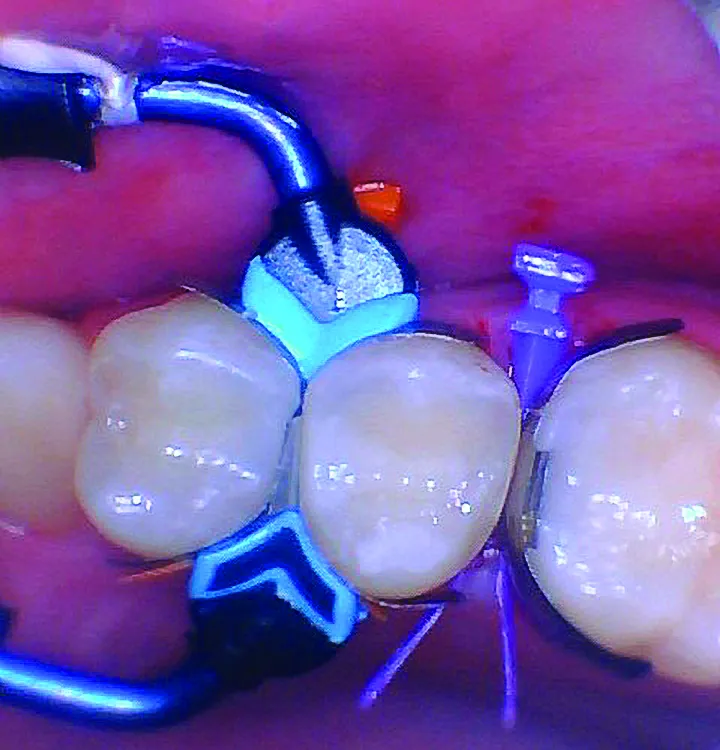
Final layer of the Filtek Supreme (3M) is placed in the occlusal portion of #12 and 13. Please note that the same method (Class II to Class I with snowplow) was utilized for #14. All restorations are placed. Following polymerization, the Universal Quad ring (blue), matrix bands, and Quad wedges are removed. Minor occlusal and marginal polishing is completed.
Full Size Image
Full Size Image
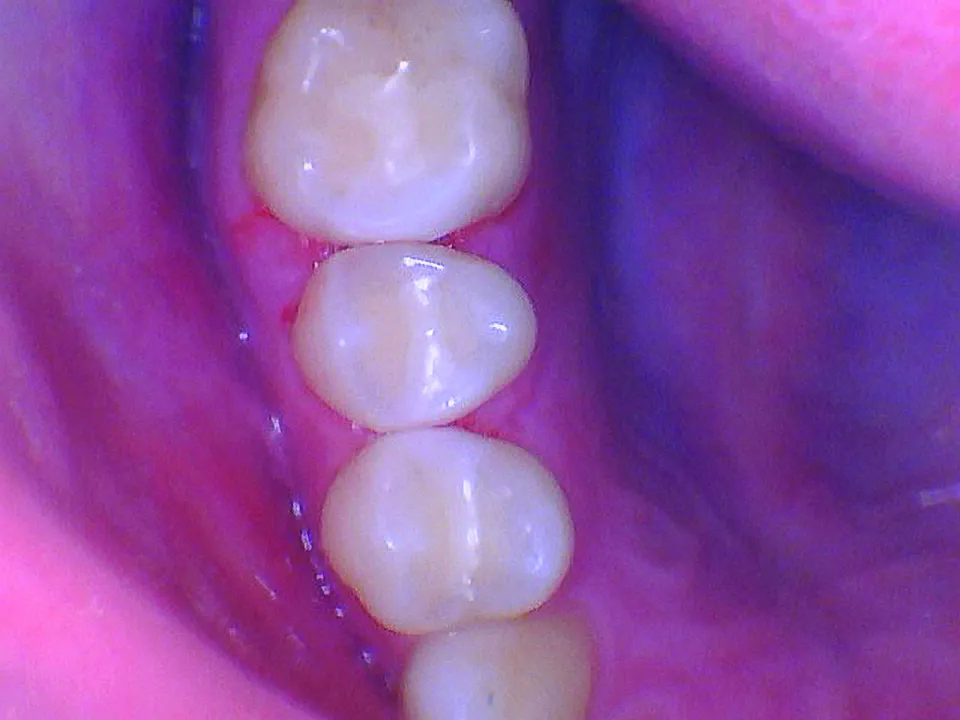
Final restorations and final bitewing images (taken to ensure a clean margin #14 mesial). Total treatment time was 43 minutes. It was in the best interest of the situation to allow time for the hemostatic agent to work, allowing excellent marginal seal and clear operator visibility during matrix and wedge placement. This step is time well spent!